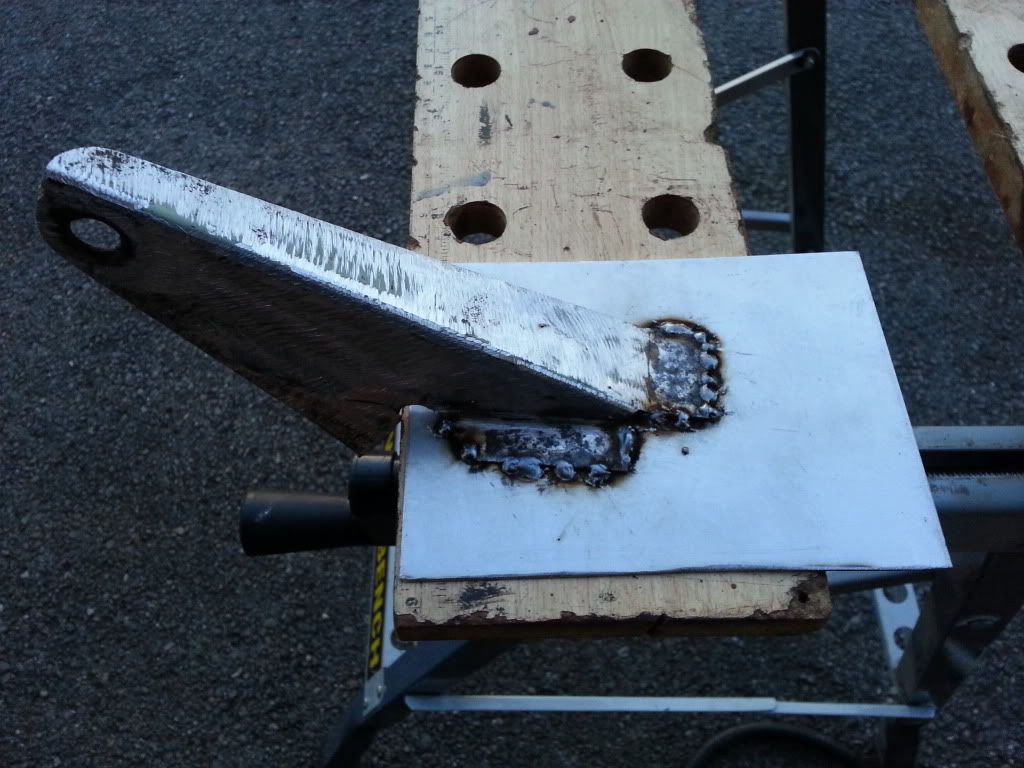
Thanks for the comments. I thought I would have to clean up the area on the car before welding the new bit in. I decided to go for small "pulse" welds for attaching the bracket as I didn't want to make a mess with continuous welds!
Oh and I have already invested in an auto dimming helmet, much better!
MIG welding newbie - First attempt
Re: MIG welding newbie - First attempt
Last edited by jpsh120 on Fri Mar 15, 2013 8:41 am, edited 1 time in total.
1971 Sunbeam Rapier H120
Re: MIG welding newbie - First attempt
Can't believe that's your first attempt,it's damn good,alot better than my first attemptjpsh120 wrote:
Re: MIG welding newbie - First attempt
I welded the bracket back onto the car today, again it's not fantastic but good enough;
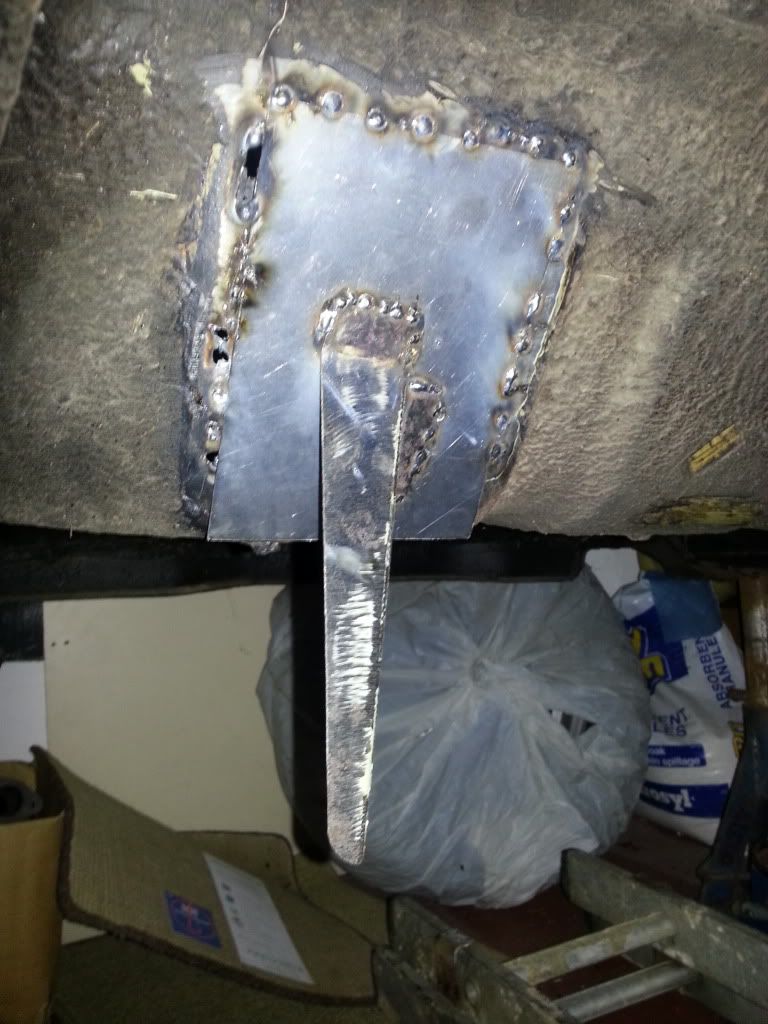
It blew threw a couple times on the left due to the original metal being very thin. In fact that repair has already been attempted once before but not very well! I think I will probably have to replace a larger section at some point. Worse I fear than the dodgy metalwork is forgetting to flick my mask down at one point. I realised as I pulled the trigger and shut my eyes but not quite quick enough
Hope the pain isn't too bad
1971 Sunbeam Rapier H120
Re: MIG welding newbie - Update!
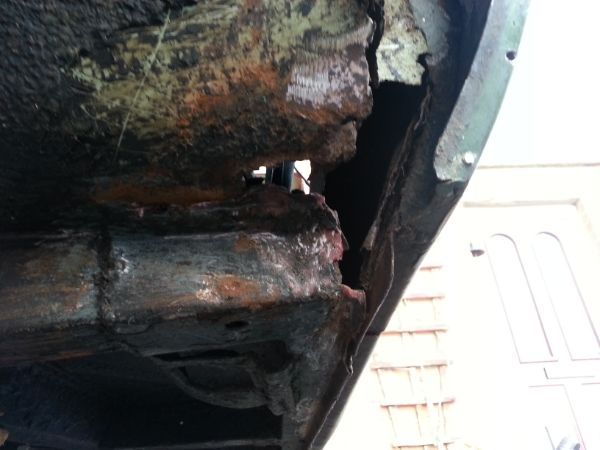
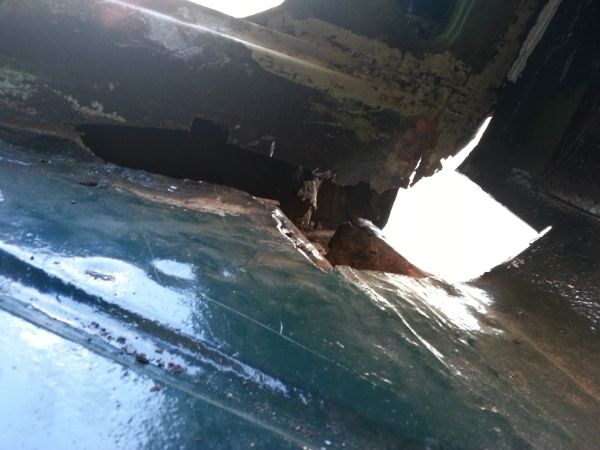
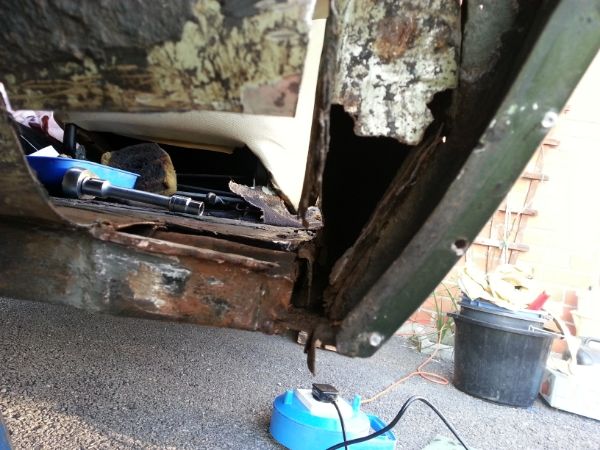
So after my first attempt on the simple bracket it was time to tackle the grot in the n/s footwell/sill area. As you can see it was a right mess and took some cleaning back to properly assess the area and repairs required;
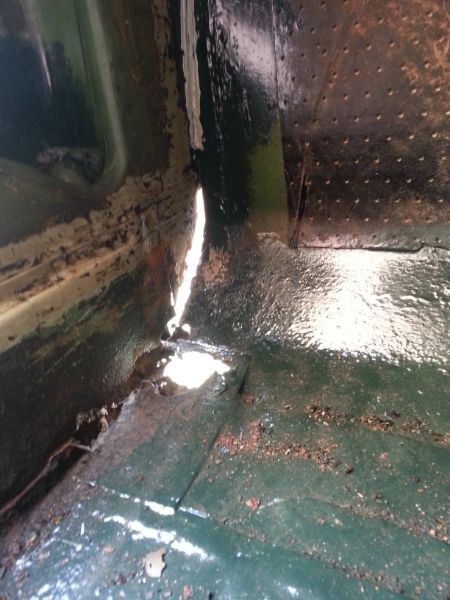
I tried to cut out the bad bits without going too far but in some cases had to go a bit further to get back to something resembling good metal;
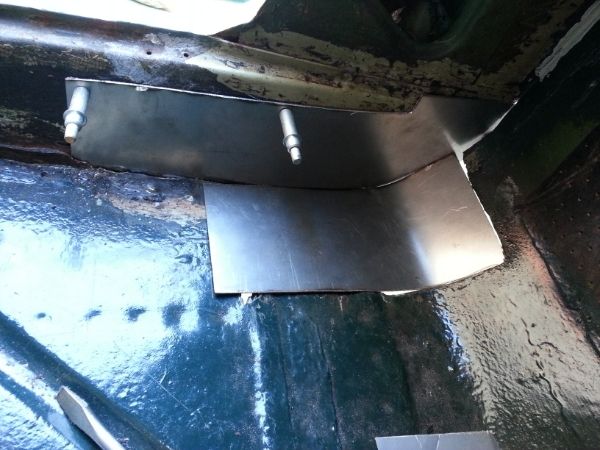
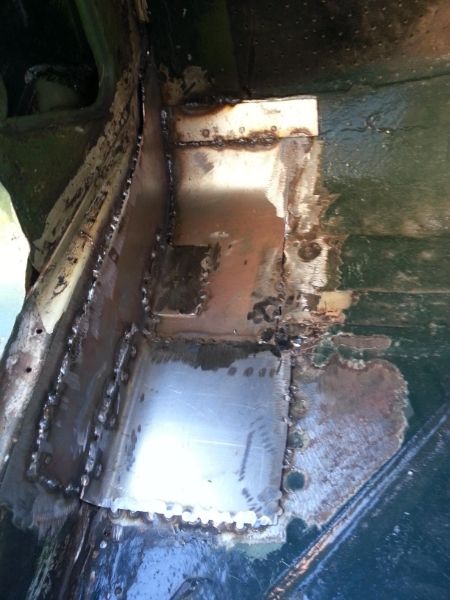
I made some sections to run along the sill and the floor which I have joined as best I can to make it as strong as possible;
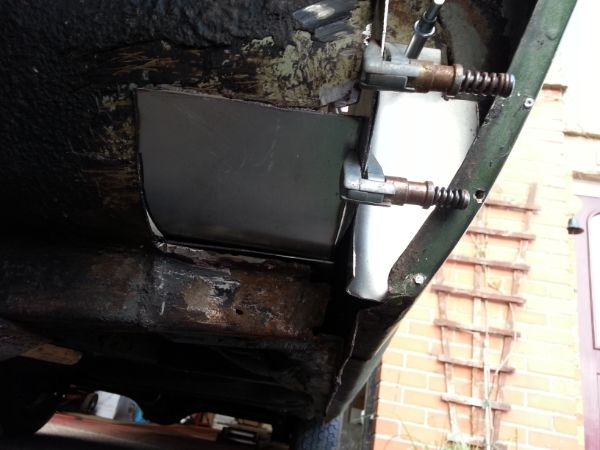
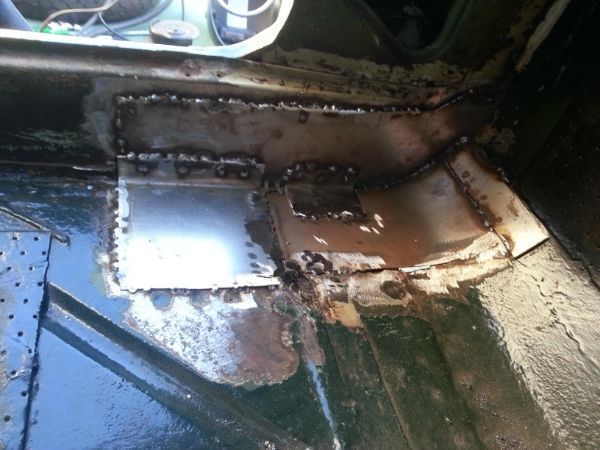
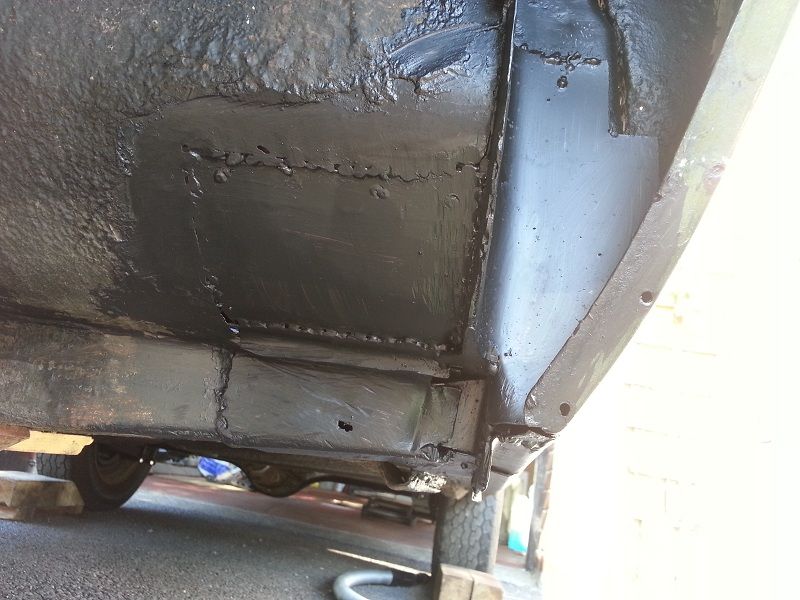
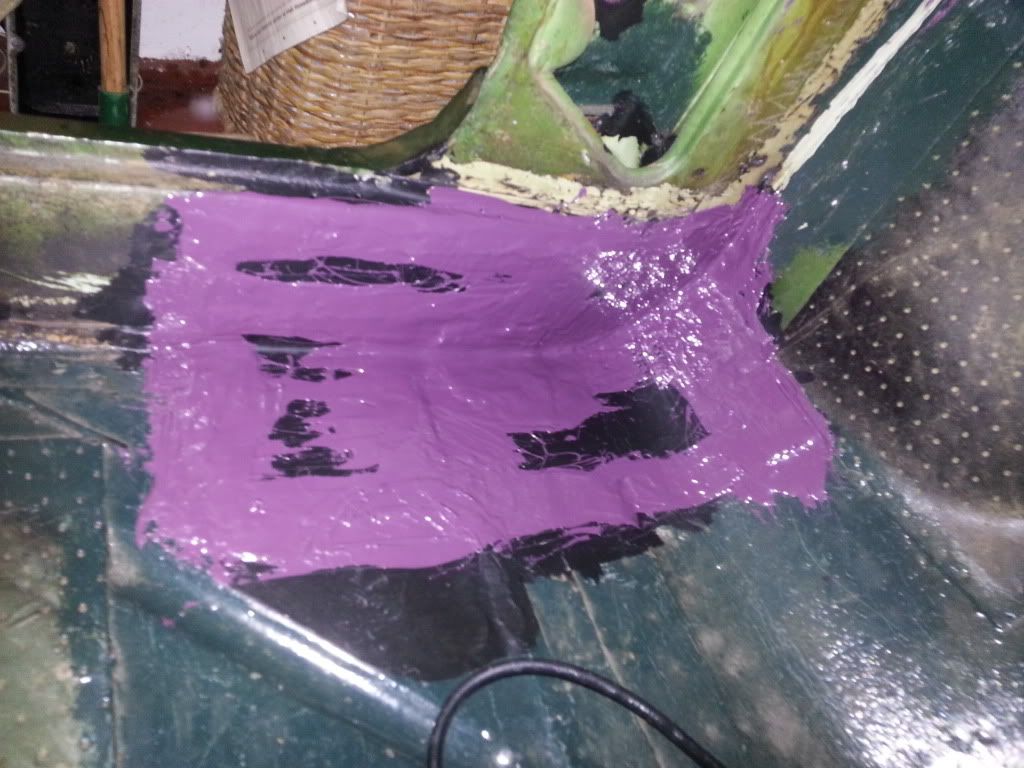
It’s just about finished and with a bit more grinding then seam sealer should look pretty good, at least it is nice and strong!
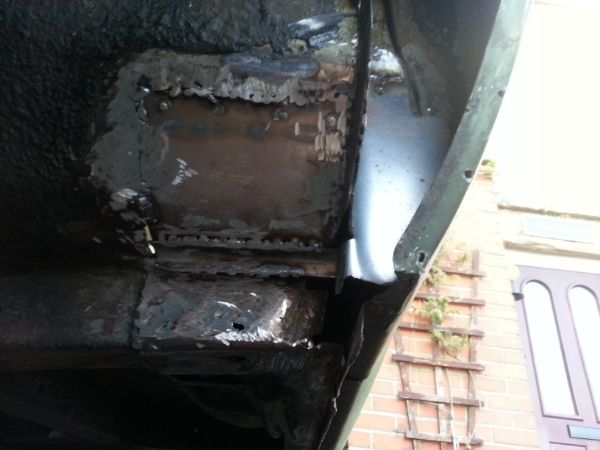
I tried to cut out the bad bits without going too far but in some cases had to go a bit further to get back to something resembling good metal;
I made some sections to run along the sill and the floor which I have joined as best I can to make it as strong as possible;
It’s just about finished and with a bit more grinding then seam sealer should look pretty good, at least it is nice and strong!
1971 Sunbeam Rapier H120

Re: MIG welding newbie - First attempt
Well done, that looks soooooo much better than my attempt.
Understeer: when you hit the wall with the front of the car.
Oversteer: when you hit the wall with the back of the car.
Horsepower: how fast you hit the wall.
Torque: how far you take the wall with you.
Oversteer: when you hit the wall with the back of the car.
Horsepower: how fast you hit the wall.
Torque: how far you take the wall with you.
Re: MIG welding newbie - First attempt
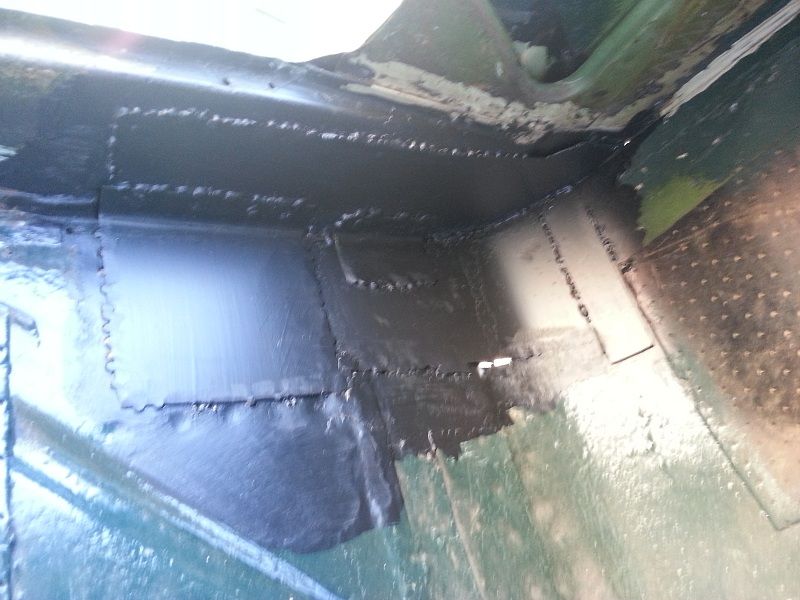
All finished now, coat of rust proof, then seam sealed then painted. Underside will be wax-oyled to complete the job 

1971 Sunbeam Rapier H120
Re: MIG welding newbie - First attempt
not bad mate!