Page 30 of 37
Re: Early Javelin Restoration
Posted: Tue Jan 21, 2014 10:18 am
by Grumpy Northener
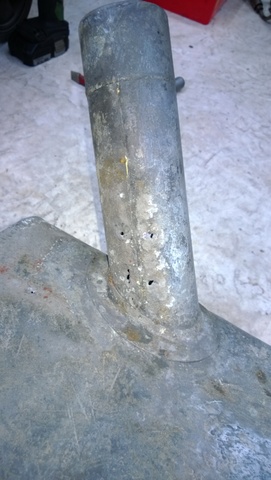
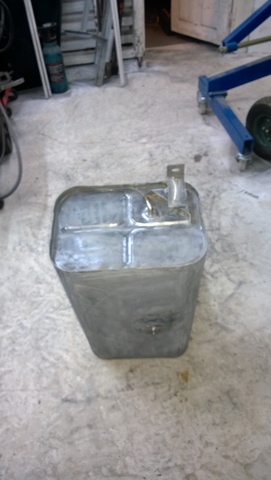
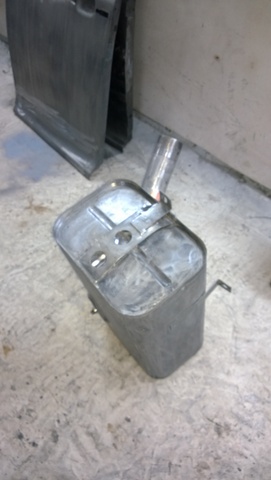
I would like to get the mechanical parts into paint in the near future so that Keith can start to rebuild them into sub assemblies - I don't want to be having to delay the bodywork on the panels & shell by having to paint the mechanical parts in several batches so the plan is get the majority in to primer & colour in one large batch - the petrol tank forms part of this batch but required work

- WP_20140119_011-001.jpg (64.36 KiB) Viewed 1978 times
- WP_20140119_012-001.jpg (69.36 KiB) Viewed 1978 times
- WP_20140119_013-001.jpg (64.55 KiB) Viewed 1978 times
With perforations to the filler neck and top of the tank - loose mounting bracket - the tanks are not available new so repairs would be required.
Re: Early Javelin Restoration
Posted: Tue Jan 21, 2014 10:39 am
by Grumpy Northener
Before I go any further can I add a word of caution - this tank has been dipped clean using a acid based process and is free of all petrol vapours / a clean tank process can also be achieved by boiling the tank out which involves running a steam cleaner through the tank for several hours (Steam cleaner is hot process pressure washer and no the same results can not be achieved with a DIY cold water pressure washer that you would normally use for cleaning the patio at home with) - if you can not obtain a clean tank condition then please do yourself, your family and everybody else a favour - do not attempt a hot process repair on a petrol tank !! Nor be hood winked into thinking that just because the tank in question has been sat outside off the car in the shed & empty for the last couple of years that's its now safe to weld up

Believe me it isn't !!!
Most automotive radiator repair companies will undertake fuel tank repairs at very reasonable costs when compared to the expense of a new tank or if the tank in question is no longer obtainable.
- WP_20140119_015-001.jpg (69.89 KiB) Viewed 1978 times
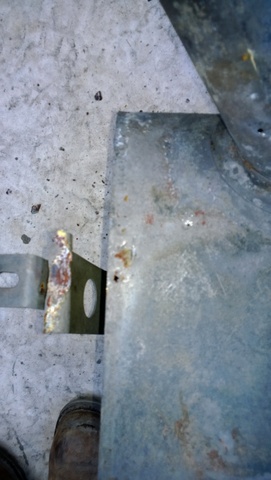
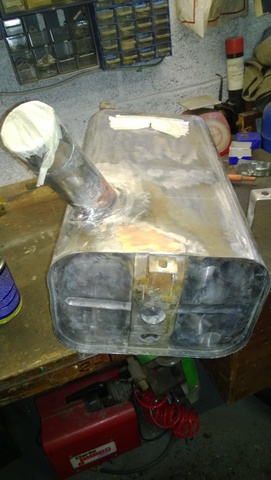
I spot welded the bracket back in to place and then solder pasted the repair area on the top of the tank
- WP_20140119_016-001.jpg (76.64 KiB) Viewed 1978 times
I am using sheet copper for the repairs but you can also use sheet steel providing you tin it up first (tinning is achieved by solder pasting the steel)

- WP_20140119_017-001.jpg (69.61 KiB) Viewed 1978 times
Repairs to top of tank & filler neck completed by soldering the repair areas both of these areas are well hidden between the top of the tank and the bodyshell of the car
Re: Early Javelin Restoration
Posted: Tue Jan 21, 2014 10:44 am
by Grumpy Northener
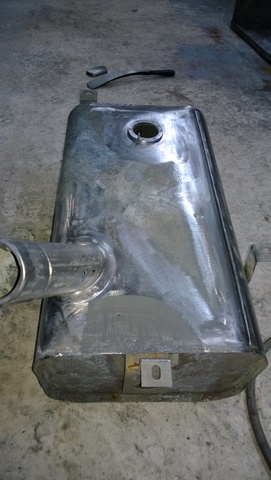
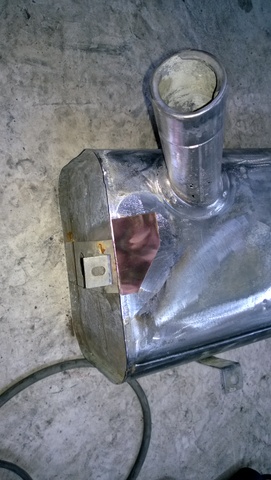
I cleaned up the rest of the tank and then soldered the seam / mounting ring for the tank gauge sender / outlet feed & the drain plug
- WP_20140119_018-001.jpg (58.55 KiB) Viewed 1978 times
- WP_20140119_019-001.jpg (53.93 KiB) Viewed 1978 times
All that is required now is testing - then I can sort out a couple dents that it has acquired over the years prior to it getting painted
Re: Early Javelin Restoration
Posted: Tue Jan 21, 2014 9:23 pm
by mach1rob
I have a feeling this is going to be quite some Javelin when it's all finished

Re: Early Javelin Restoration
Posted: Fri Jan 24, 2014 8:40 pm
by vulgalour
Why did you choose to use copper rather than steel when repairing the fuel tank?
Re: Early Javelin Restoration
Posted: Sat Jan 25, 2014 8:30 am
by Grumpy Northener
Why did you choose to use copper rather than steel when repairing the fuel tank?
I just happened to have some off cuts of sheet copper handy and it saved me from tinning up the sheet steel that I would have used otherwise
Re: Early Javelin Restoration
Posted: Sun Jan 26, 2014 12:26 am
by vulgalour
I thought there might be some special reason because of it being a fuel tank, hence my asking. It's a shame that all these nicely restored bits are going to be hidden after they've been painted, you know.
Re: Early Javelin Restoration
Posted: Sun Jan 26, 2014 9:21 am
by Grumpy Northener
It's a shame that all these nicely restored bits are going to be hidden after they've been painted, you know.
Unfortunately it's often the case with restorations that the best examples of the work undertaken is hidden and will never be noticed !!
Re: Early Javelin Restoration
Posted: Mon Jan 27, 2014 7:45 am
by Grumpy Northener
We tested the tank by immersion in a water tank and pressurising the petrol tank with compressed air

- WP_20140126_001-001.jpg (65.56 KiB) Viewed 1881 times
A few very minor weeps showed up but in the main these were the spotwelds that retained the internal baffle plates that we had not touched so far - they were soon made good and the tank retested - happy with the soundness I left the tank to dry out on top of the stove for the rest of the afternoon

- WP_20140126_004-001.jpg (69.24 KiB) Viewed 1881 times
Before leaving I added POR 15 tank sealer (available from Frost Restoration Products) to the tanks internals and sloshed it around for half an hour before draining it
- WP_20140126_028-001.jpg (71.84 KiB) Viewed 1881 times
This should take care of the tank and prevent any rust forming internally in the future
Re: Early Javelin Restoration
Posted: Mon Jan 27, 2014 7:50 am
by Grumpy Northener
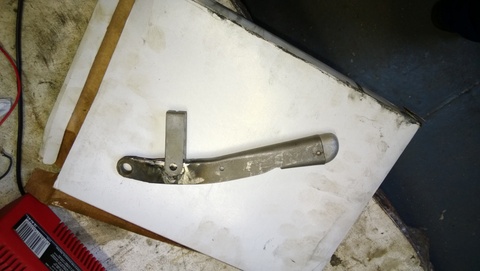
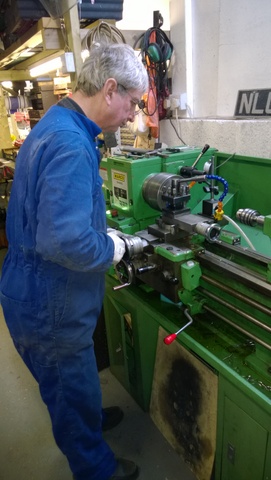
Meanwhile Keith has been busy sorting the handbrake set up
- WP_20140126_010-001.jpg (59.35 KiB) Viewed 1880 times
Welded repairs and strengthening webs added
- WP_20140126_009-001.jpg (74.21 KiB) Viewed 1880 times
New retaining pin for the cable bracket machined to take into account the extra width of the strengthening webs