Page 24 of 43
Re: kevin s's blog
Posted: Tue Apr 21, 2015 7:38 am
by Grumpy Northener
Finally I thought I would share another project I have been working on, a fold flat blast cabinet made from scrap wood and a aggregate bag.
Great bit of innovation for those of us that have restricted space in our garages / workshops and built for a few quid - with the viewing glasses I was reading recently that in order for the glass to remain scratch / wear free it needs to have a certain coating on it - this is readily available in the market has replacement glass / lenses for bar code scanners - they cost about £5 - £6 each - they are probably only 200mm x 200mm but using timber or metal glazing bars you can build a window of approx 600mm x 400mm using 6 of them - or larger / smaller as you wish but it gives you a scratch / wear resistant viewing window that even the most professional sandblasting equipment does not have.
Re: kevin s's blog
Posted: Tue Apr 21, 2015 8:00 am
by tractorman
While it isn't perfect, I used "florist's film" to protect my "glass" (actually a sheet of styrene) and sealed that to the cabinet with double-sided tape before screwing the glazing to the outside of the cabinet. The film is "sacrificial" and needs changing quite often, but the glazing is the original piece and is still in good condition considering some of the heavy stuff I've been blasting at high pressures!
My main problem was lighting; when working at high pressure and flow, there's a lot of dust in the cabinet and even a 60W bulb couldn't light the cabinet adequately. I intend to make two or three more "vision panels" and put some glazing in the roof in the hope that it helps.
Mind you, it's a lot cheaper and more convenient just to use an angle grinder for most of my de-rusting and paint removal. The added bonus is that the grinder's noise annoys a lot of neighbours

Re: kevin s's blog
Posted: Tue Apr 21, 2015 5:41 pm
by kstrutt1
I also find it gets very dusty, I had to stop every few minutes to let it die down, angle grinders are great and much quickerbut they can't get into tight corners like the A pillar panels on the minor shown earlier in the thread.
Kevin
Re: kevin s's blog
Posted: Fri Apr 24, 2015 11:09 am
by Fatbloke
Love the improv blasting cabinet. Clever chap!
Re: kevin s's blog
Posted: Fri Apr 24, 2015 5:11 pm
by rich.
what blasting nozzle are you using?

Re: kevin s's blog
Posted: Fri Apr 24, 2015 5:58 pm
by kstrutt1
Its the ceramic one which came with the blast tank shown on the bootom left I will measure the diameter later. The tap that came with it was not up to much, the blast media wore a hole through the back of it I have fitted a more robust one now.
Re: kevin s's blog
Posted: Fri Apr 24, 2015 6:35 pm
by tractorman
I have a similar blasting pot and, as Kevin's, the valve on the hose wore out very quickly. I bought a stainless steel valve as, when I checked eBay, I could get four "original" ones for the price of a stainless (and the stainless valve will last a lot longer than four chrome-plated brass ones)! I suspect that I'm using too much pressure (and the smallest nozzle) and there would be a lot less dust if I used less pressure and/or the larger nozzle. However, my compressor would have problems keeping up with a larger nozzle (though the FAD is high enough!), it runs more or less constantly on bigger jobs!
I have a slightly more advanced extraction system on mine to reduce the dust and there's a cheap air filter element to allow air in (when the blaster isn't working) which tends to let excess air out rather than it's intended function (to let air in when the blaster is shut off).
Pics are somewhere on the forum, but they are also here:
https://www.flickr.com/photos/cumbriant ... 544723302/
I won't post them here - saving space on Kevin's blog, which is much more interesting!
Re: kevin s's blog
Posted: Fri Apr 24, 2015 8:53 pm
by kstrutt1
It was big great chunky stainless valve I brought too, should last a lot longer than the flimsy brass one!
Had a go at fixing the oil leaks on the tr tonight, I have tried fitting rubber rocker cover gaskets, as most of it seems to be leaking from the back of these, so far it seems dry and no burning oil smells.(it used to get on the exhaust)
I also fitted the new deckless radio to the tr which looks much better as the old one stuck out 3/4 inch, then moved the tr one to the landie so I now have working radios in all the cars, just need to get the kids to put some music on my phone now!
Re: kevin s's blog
Posted: Sun Apr 26, 2015 9:02 pm
by kstrutt1
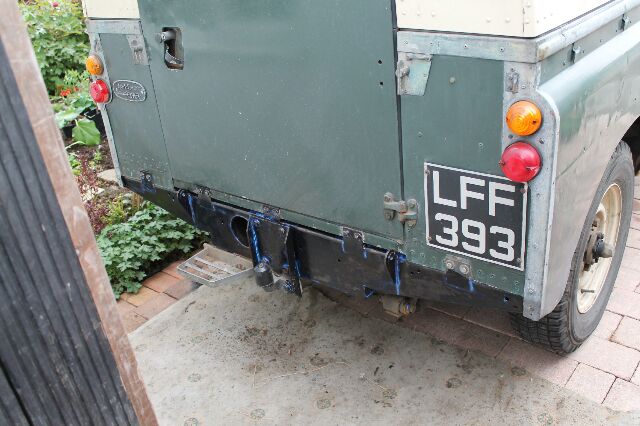
A little more progress today, fitted the new damper bushes to the bottom of the landie rear dampers which went pretty easily, the old ones were completely shot, while under there I noticed the rear x member was getting pretty rusty (only surface rust) sio I cleaned this up and gave it a coat of rust converter, this will thgen be painted, the rest of the chassis also has a few areas of surface rust, later in the year I will go over it all with converter and black wax.
- rps20150426_214902.jpg (55.58 KiB) Viewed 1780 times
.
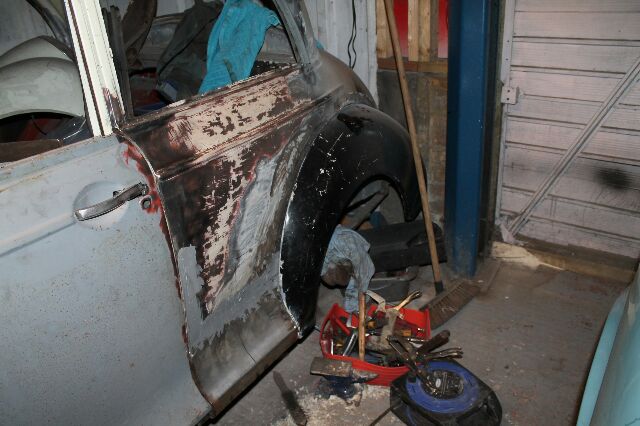
I have also fitted the rear wing to the minor.
- rps20150426_214652.jpg (53.51 KiB) Viewed 1780 times
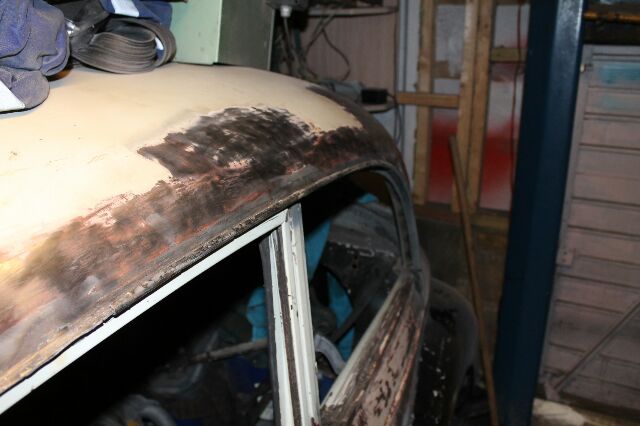
And fitted a bit more gutter.
- rps20150426_214602.jpg (39.95 KiB) Viewed 1780 times
Re: kevin s's blog
Posted: Sun Apr 26, 2015 9:12 pm
by kstrutt1
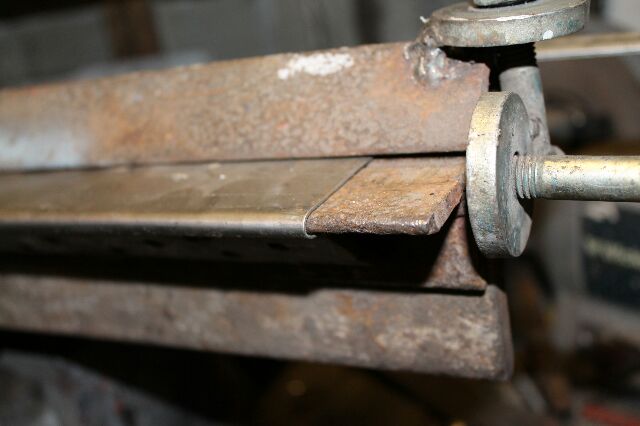
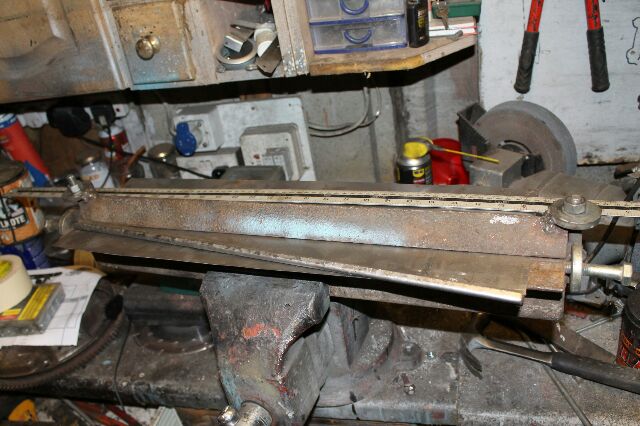
Next up I made the last few pieces of gutter, firstly I formed the basic shape over a length of angle iron (actually part of my home made metal folder)
- rps20150426_214724.jpg (31.86 KiB) Viewed 1780 times
Then cut it off the sheet using my air sheers (a little wd40 makes these cut easier)
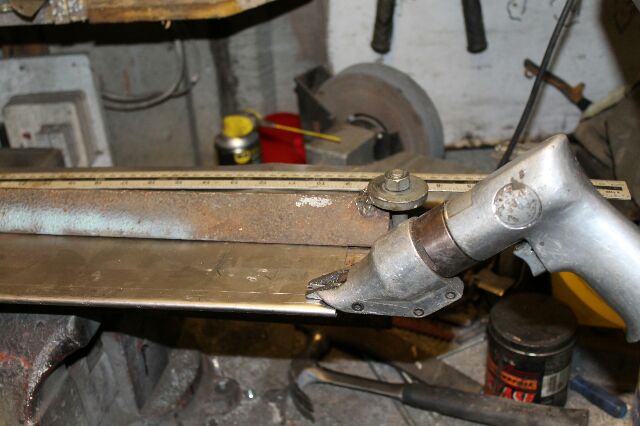
- rps20150426_214829.jpg (44.33 KiB) Viewed 1780 times
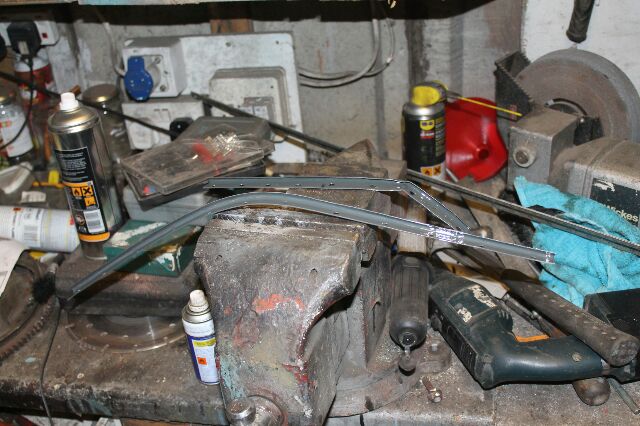
You then end up with a strip like this.
- rps20150426_214946.jpg (61.34 KiB) Viewed 1780 times
Finaly I bent it to shape by hand, drilled holes for the spot welds and primed with weld through.
- rps20150426_215031.jpg (64.96 KiB) Viewed 1780 times
Just need to weld it on now.