Page 19 of 43
Re: kevin s's blog
Posted: Wed Jul 16, 2014 10:43 pm
by JPB
Aye, now you mention it, the SOS one wasn't the same model was it? And its Dunlop wheels were smaller but with higher profile rubber. Or am I getting even more confused?
Sorry for the O/T, Kevin..

Re: kevin s's blog
Posted: Sun Jul 27, 2014 8:02 pm
by kstrutt1
Been on holiday in Norfolk for the last week so no progress on the cars, moved them around this morning as I needed to use the tr to tow a trailer, ( landie is at work) gearbox is still noisy but otherwise worked a treat, to make some space I put the lotus on the ramp, while it was up in the air, I gave it a look over underneath, all looked good except the two top ball joints which were changed a year and less than 1000 miles ago! Both gaiters were cracked and one already has some play in it. They were from ebay, lesson learnt, I have now ordered a pair from SJ Sportscars.
Kevin
Re: kevin s's blog
Posted: Thu Jul 31, 2014 9:12 pm
by kstrutt1
Re: kevin s's blog
Posted: Sat Aug 09, 2014 6:11 am
by kstrutt1
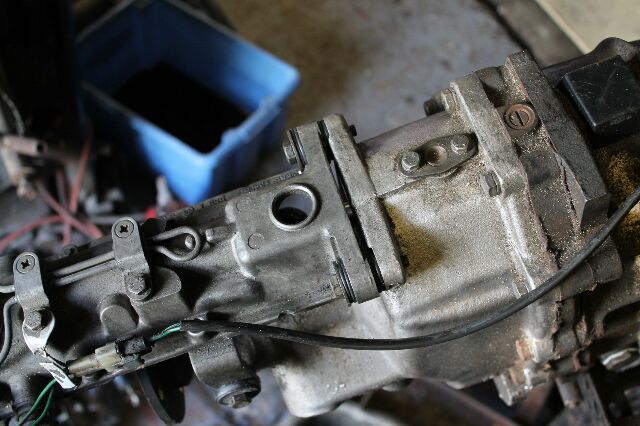
Started on the tr gearbox last night.
Firstly I stripped and replaced the oil in the "new" gearbox.

- rps20140809_064343.jpg (68.34 KiB) Viewed 1574 times
The old oil was actually pretty clean so a good sign.
Next up was starting on the removal, this is the starting point.
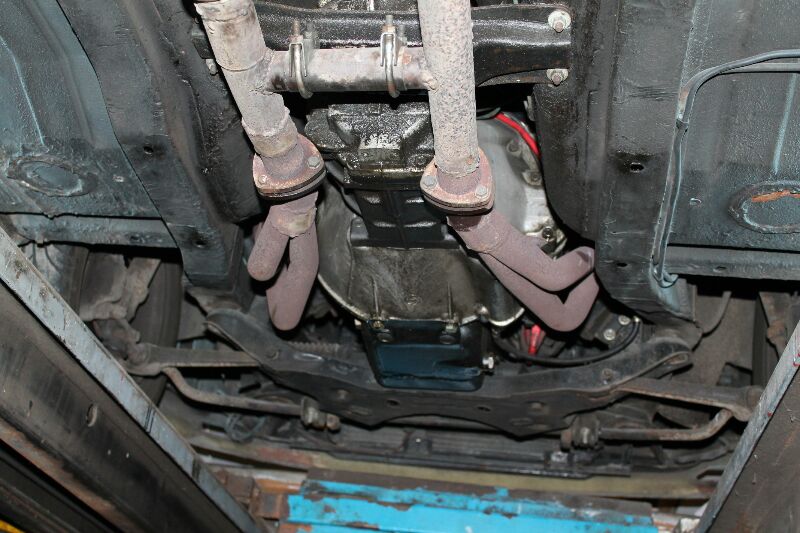
- rps20140809_064508.jpg (87.3 KiB) Viewed 1574 times
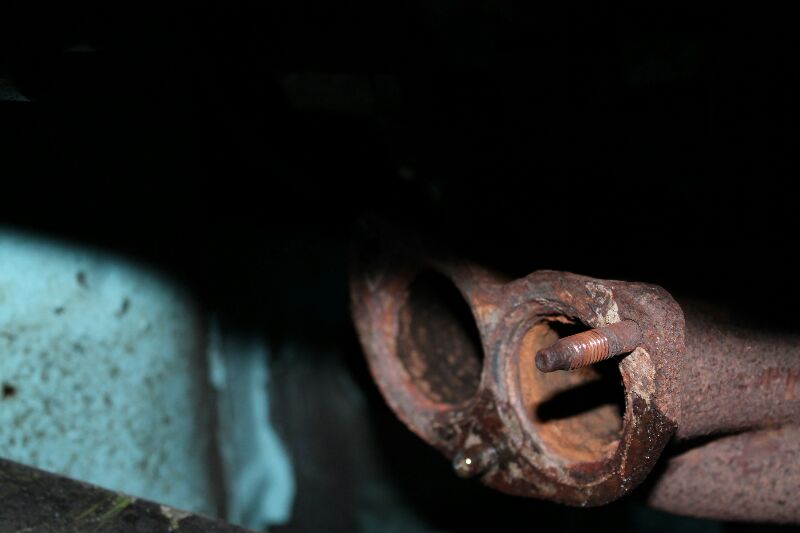
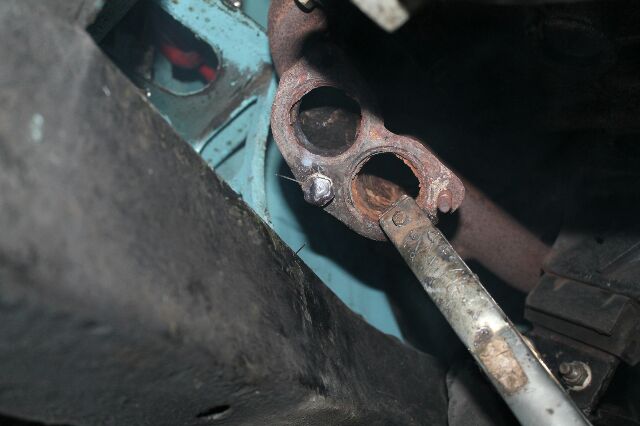
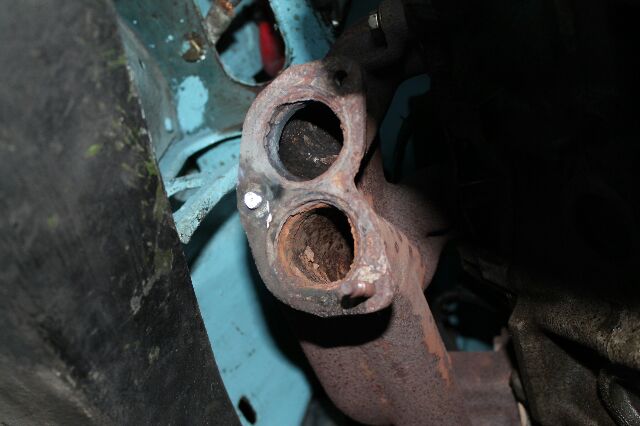
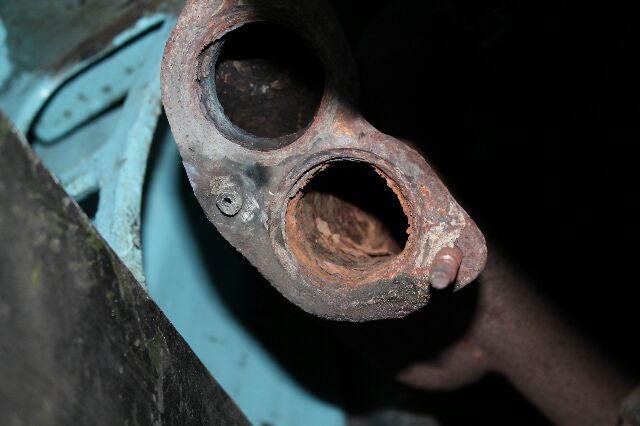
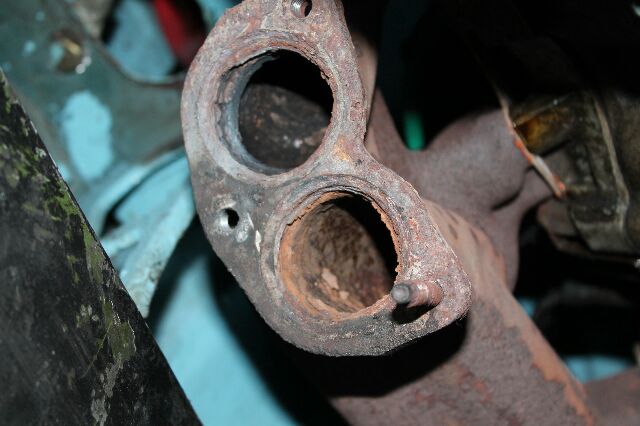
First step was removing the exhaust downpipes, all was going well until the last nut when the stud sheared.
- rps20140809_064551.jpg (31.63 KiB) Viewed 1574 times
Fortunately it is on the side with good access so If I can't get the remains out by welding a nut on it I will be able to drill it out in situ. Also both the down pipes are thin and holed around the lower flared joint so new sections will need welding in here.
The prop, gearstick speedo cable and wiring harness were removed next, then all but 2 of the engine to box bolts (easily accessed from underneath with a long extension). the jacking beam was then used to support the rear of the engine under the sump and the gearbox x member removed.
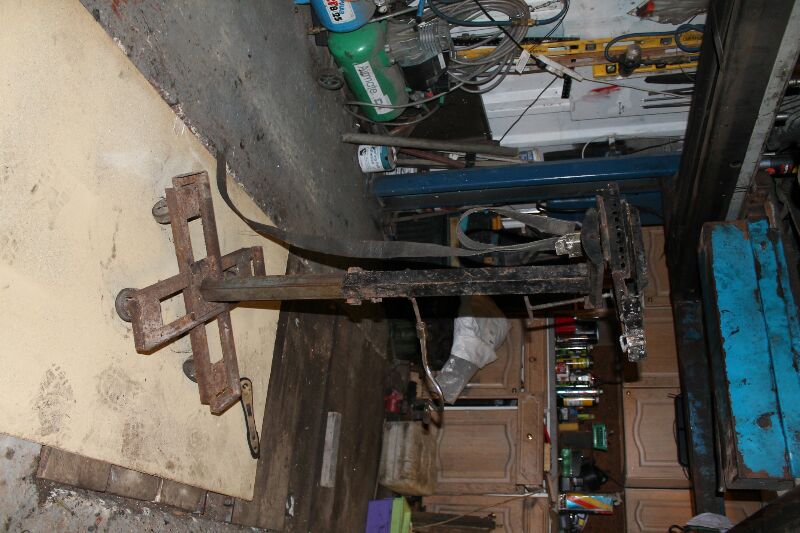
Next up was to get out a contraption I made when I had time on my hands around 18 years ago before kids came along. Basically it is a transmission jack made out of an old trolley, a consul classic jack and the angle iron from an old bedsted.
- rps20140809_064723.jpg (81.81 KiB) Viewed 1574 times
With this the trans came out ever so easily with no drama.
Re: kevin s's blog
Posted: Sat Aug 09, 2014 6:30 am
by kstrutt1
Continued..

- rps20140809_064826.jpg (64.06 KiB) Viewed 1573 times
This all took about 90 minutes so a pretty productive evening with the rain pouring I was not going to do much else, I even had a frog hopping around my feet, I think he had come in the garage to keep out of the rain.
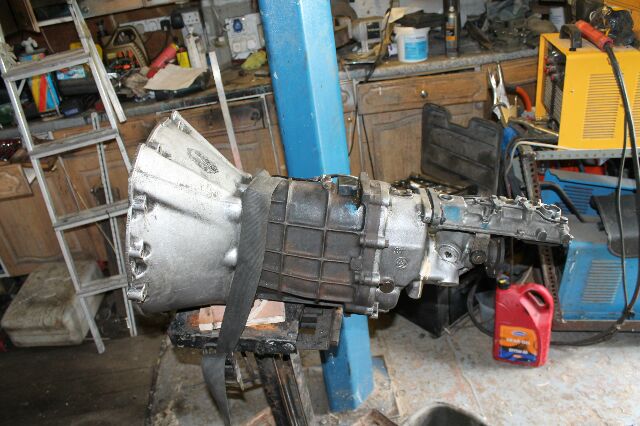
The result of the evenings labour are the clutch housings are now swapped, and the new box is on the stand ready to go in, the only problem I have is the forward gear shift housing top hat rubbers are shot (the rear ones are poly) but I should be able to make something with a slice of hose and some rubber washers.
This all that was left of the 4 rubbers.
- rps20140809_064914.jpg (81.01 KiB) Viewed 1573 times
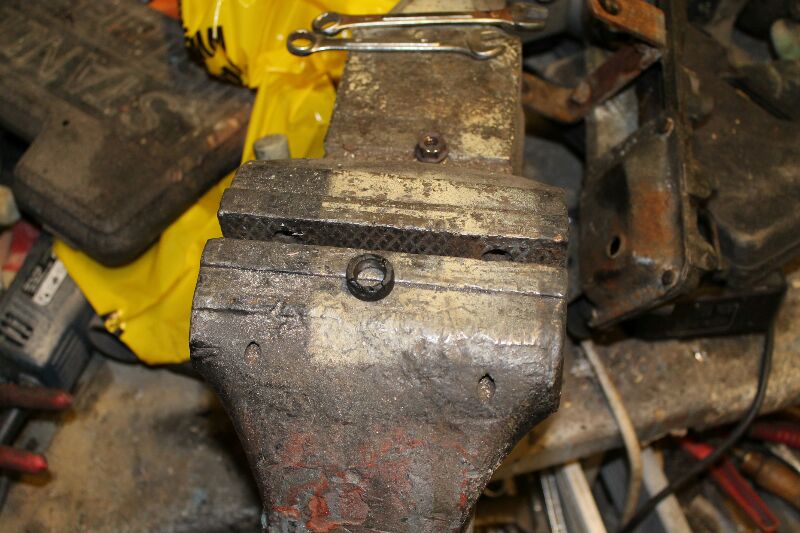
This is the gearbox mounting rubber, approx 18 years ago I modified it to take Ford rubber because the BL ones seemed to be made of cheese and were hopeless good news is the Ford ones are still cheaper so I will do the same again.
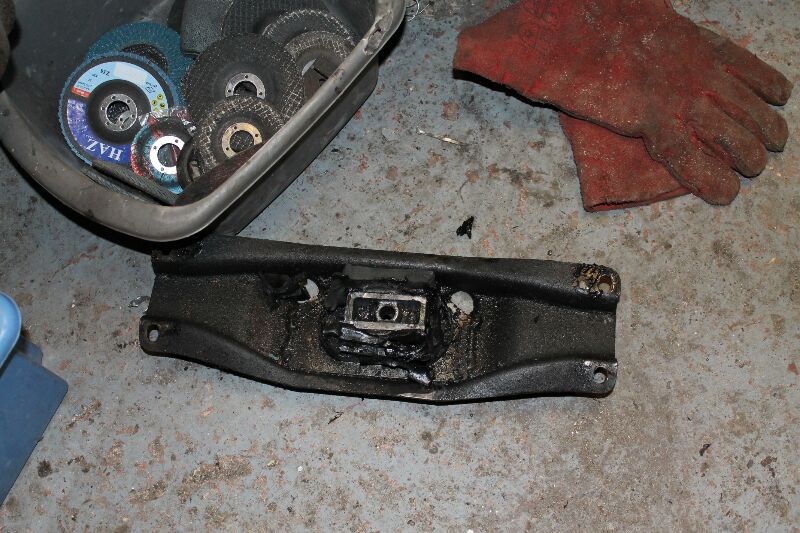
- rps20140809_065000.jpg (106.19 KiB) Viewed 1573 times
Plan is to get the box back in today do the exhaust repairs then finish it off in the week when the new mount turns up.
Re: kevin s's blog
Posted: Sat Aug 09, 2014 8:59 pm
by kstrutt1
Got the gearbox back in, it slid straight in so it only took 15 minutes before it was all bolted up to the engine.
Fitted the clutch slave cylinder, wiring and speedo cable, then lifted it up into position before I started on getting the broken stud out.
Firstly the home made bushes for the remote, I used a piece of hose cut overlength so it swells as the bolt is done up along with a couple O rings.
- rps20140809_214842.jpg (56.99 KiB) Viewed 1560 times
Gearbox eady ti go in and cleaned up a bit.
- rps20140809_214914.jpg (64.25 KiB) Viewed 1560 times
Firstly to get the stud out I tried welding a nut on.
- rps20140809_214944.jpg (34.49 KiB) Viewed 1560 times
Unfortunatelly all that happened is the stud snapped lower down, so I then had to drill it out, firstly the top was ground flat and centre punched.
- rps20140809_215012.jpg (36.18 KiB) Viewed 1560 times
Re: kevin s's blog
Posted: Sat Aug 09, 2014 9:08 pm
by kstrutt1
Next up it was drilled through with a 1/8 drill
- rps20140809_215047.jpg (34.32 KiB) Viewed 1560 times
Then it was drilled out to the correct tapping size for M8 and tapped, result is
- rps20140809_215126.jpg (42.89 KiB) Viewed 1560 times
Next up is welding up the downpipes, they really have had it with several pin holes and cracks around the lower flange, the suggestion that I might need £160 worth of exhaust was met by comment about having too many cars from she who must be obeyed so welding up the old ones it is!
Plan to get the exhaust done tomorrow, that will only leave the gearbox mount when it arrives.
Re: kevin s's blog
Posted: Sun Aug 10, 2014 7:03 am
by Luxobarge
kstrutt1 wrote:Then it was drilled out to the correct tapping size for M8 .
Surely M8 isn't correct for a TR???
Re: kevin s's blog
Posted: Sun Aug 10, 2014 9:37 pm
by kstrutt1
Most of the tr7 is metric, the exhaust manifolds are sd1 and the other 5 studs are m8, the rover v8 seems a mixture I suspect as parts were modified they moved to metric.
Today I welded up the manifolds, not pretty but should last another 2 or 3 years suprisingly the metal was pretty thick around the pin holes so these were easily welded, the flange was a little more difficult an I ended up laying a fairly large area of weld on, afterwards I gave it all a coat of vht which may help a little, I will though keep my eye out on ebay for better parts.
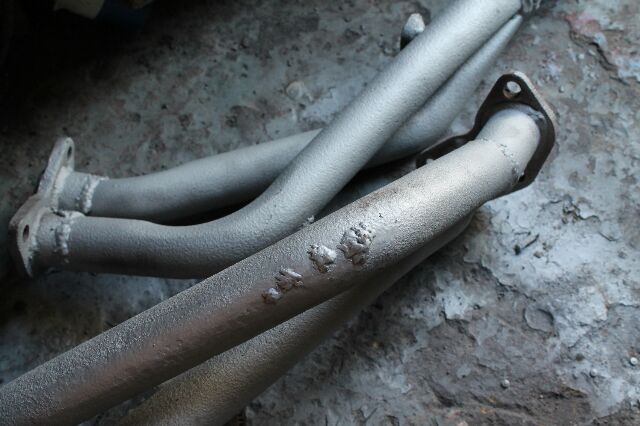
- rps20140810_222908.jpg (48.57 KiB) Viewed 1531 times
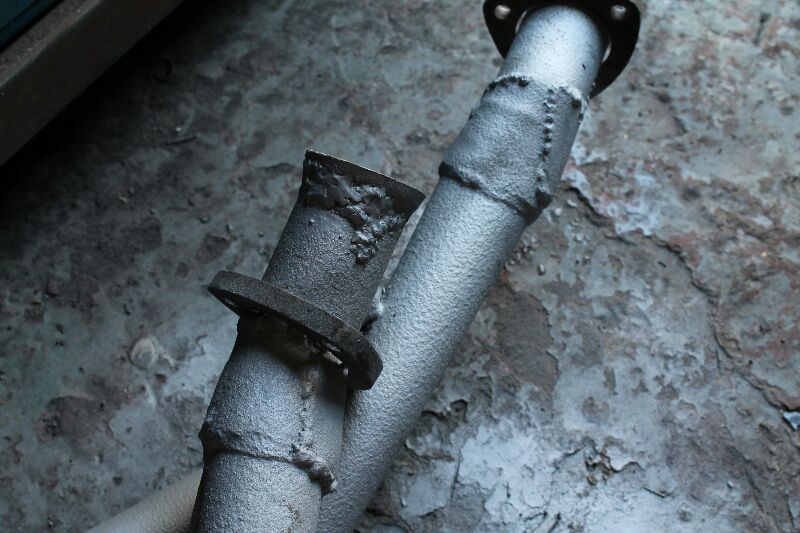
- rps20140810_222831.jpg (78.55 KiB) Viewed 1531 times
When the Trans mount turns up I will put it the exhaust back on (to make sure it is aligned correctly) and the job will be finished.
Re: kevin s's blog
Posted: Mon Aug 18, 2014 5:28 pm
by kstrutt1
Been busy building the greenhouse so not much time on the cars, I have finished the tr, got up at 6 on saturday morning to finish it, had it all done and tidied up by 8, not driven it yet but it doesent make the noises at idle and all the gears work ok, so I don't expect any problems, with the pin holes welded in the downpipe it is noticibly quieter though.
I have been using the landie all weekend to ferry my daughter to the v festival, great on the muddy field used as for drop off / pick up and the taxis don't try to push in front of it!
I have also finally wired up the front speakers on the landie and added some rubber between the steering column and it's bracket to stop it rattling at idle.
Next up is to rustproof the Mazda and give the landie a service before the winter, I might even get round to some more welding on the minor.