You are definitekly very brave taking this on. But I am glad somebody did. The guy I acquired my Mini Traveller from had one of these and it was a lovely car. I have a photo of it somewhere.
Cheers,
BRAVE or just FOOLISH RM RESTO
Re: BRAVE or just FOOLISH RM RESTO
Brett Nicholson
1965 Morris Mini Traveller - Trixie
1966 Austin Mini Super-Deluxe - Audrey
1969 Morris Mini Van - Desert Assault Van
1971 Morris Moke - Mopoke
1974 VW Super Beetle - Olive
2009 Nissan Pathfinder
1965 Morris Mini Traveller - Trixie
1966 Austin Mini Super-Deluxe - Audrey
1969 Morris Mini Van - Desert Assault Van
1971 Morris Moke - Mopoke
1974 VW Super Beetle - Olive
2009 Nissan Pathfinder

Re: BRAVE or just FOOLISH RM RESTO
Well, I've been trying to get a hour or two on the Riley most evenings work permitting.
The NOS head gasket arrived a couple of days ago so it was time to find out if the engine had hope or not. So time to try and get it back together.
This was the first problem
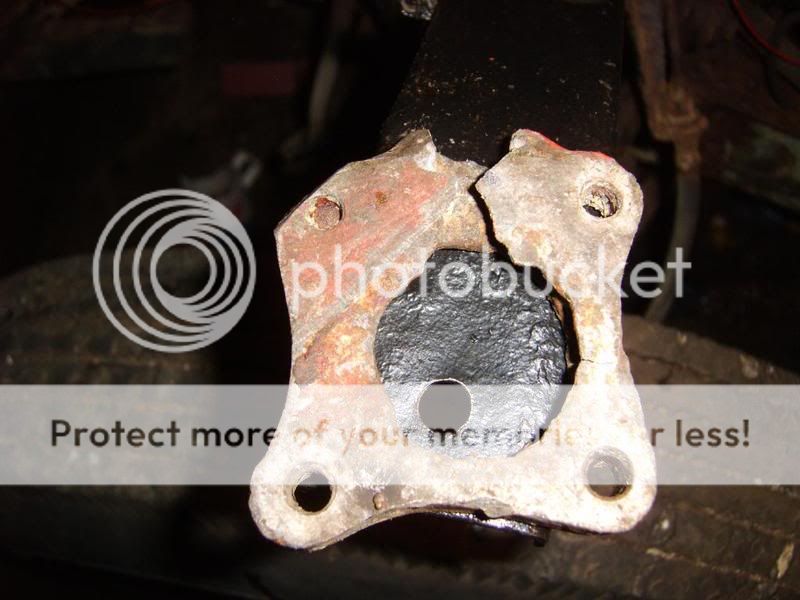
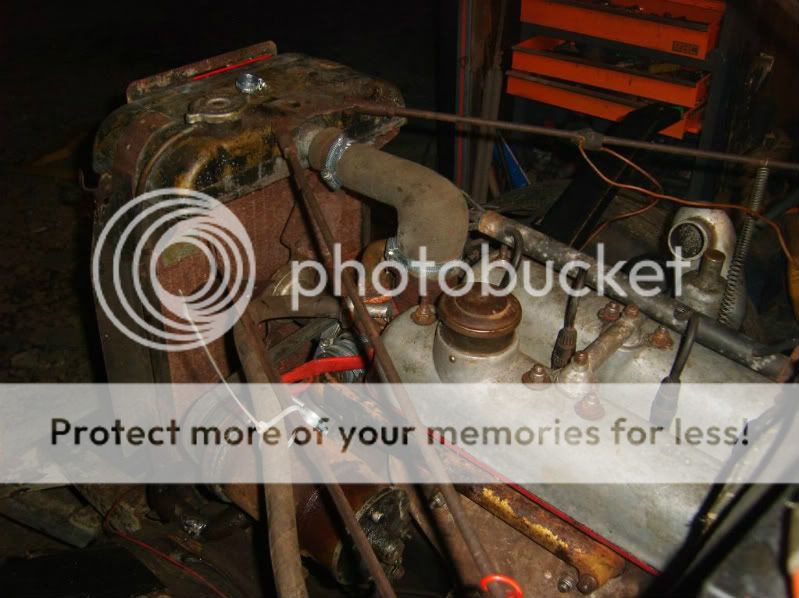
The alloy heater take off that sits below the thermostat housing on top of the head decided on removal that it had no intention of being part of this project and simply crumbled away in protest at the thought of coming out of retirement.
So, to avoid delay and a possible hefty price tag if I could track one down I resolved to make my own version. Slightly different in looks but I think something of a succsess. This "resto" has to be done on a restricted budget, but also needs to be to a reasonable standard capable of regular use, as thats how I intend to use it, for popping to the shops and general gadding about. The words "Riley RM" and "limited budget" are rarely used together, but I reckon with a little inginuity and effort things might turn out o.k.
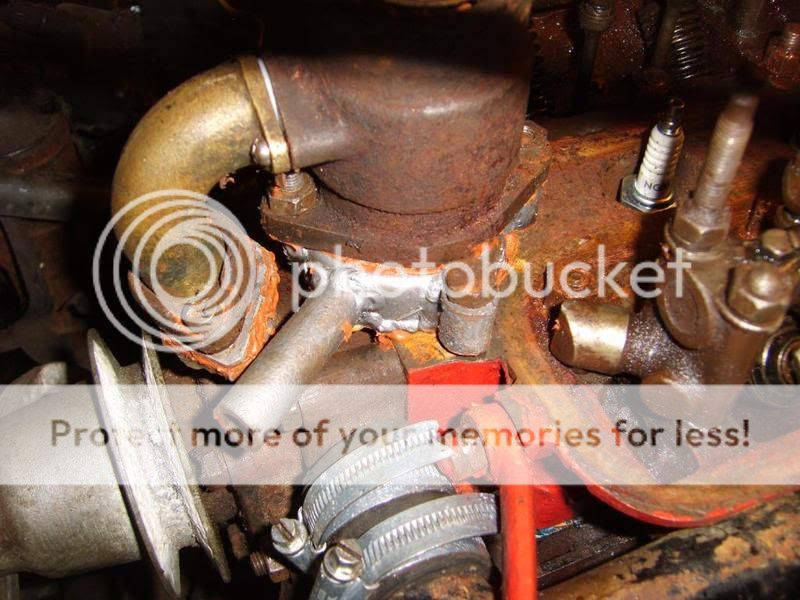
Youll have to forgive the instant gasket but I wanted to play it safe, anyway, I can safely say it does the job just fine, and should last as long as the original
That dealt with the head was fitted
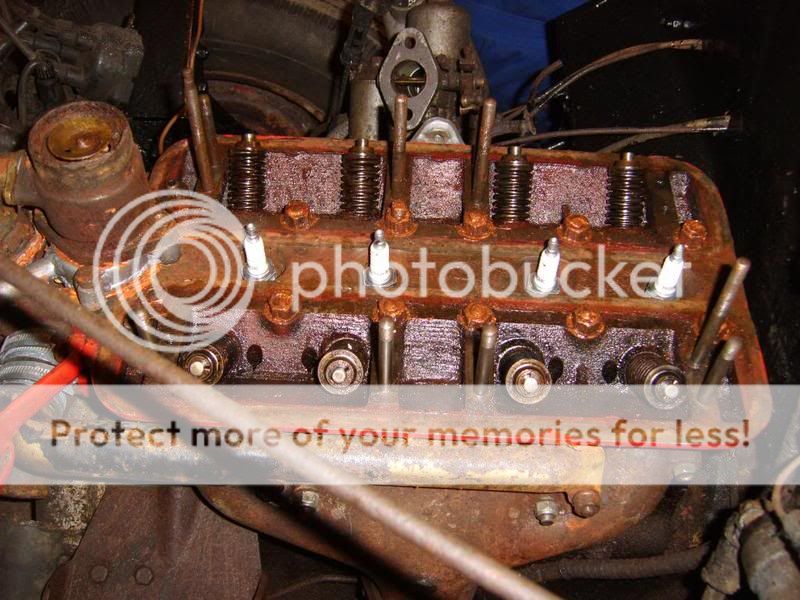
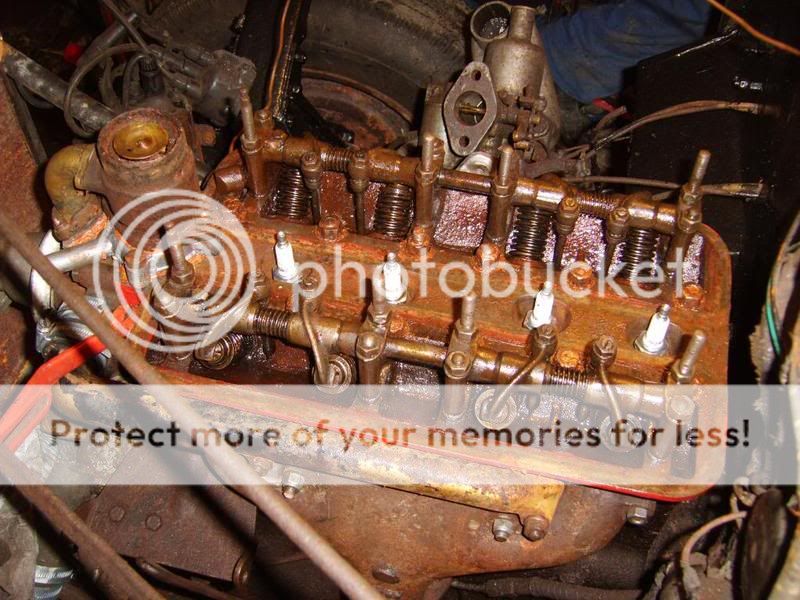
Torqued down to 45 lbft with studs and nuts coated in copper slip to avoid sticktion in an effort to get a true torque reading.
Then, push rods and rockers fitted, clearences set using the rule of five on each set of rockers this being a twin cam engine.
The NOS head gasket arrived a couple of days ago so it was time to find out if the engine had hope or not. So time to try and get it back together.
This was the first problem
The alloy heater take off that sits below the thermostat housing on top of the head decided on removal that it had no intention of being part of this project and simply crumbled away in protest at the thought of coming out of retirement.
So, to avoid delay and a possible hefty price tag if I could track one down I resolved to make my own version. Slightly different in looks but I think something of a succsess. This "resto" has to be done on a restricted budget, but also needs to be to a reasonable standard capable of regular use, as thats how I intend to use it, for popping to the shops and general gadding about. The words "Riley RM" and "limited budget" are rarely used together, but I reckon with a little inginuity and effort things might turn out o.k.
Youll have to forgive the instant gasket but I wanted to play it safe, anyway, I can safely say it does the job just fine, and should last as long as the original
That dealt with the head was fitted
Torqued down to 45 lbft with studs and nuts coated in copper slip to avoid sticktion in an effort to get a true torque reading.
Then, push rods and rockers fitted, clearences set using the rule of five on each set of rockers this being a twin cam engine.
Re: BRAVE or just FOOLISH RM RESTO
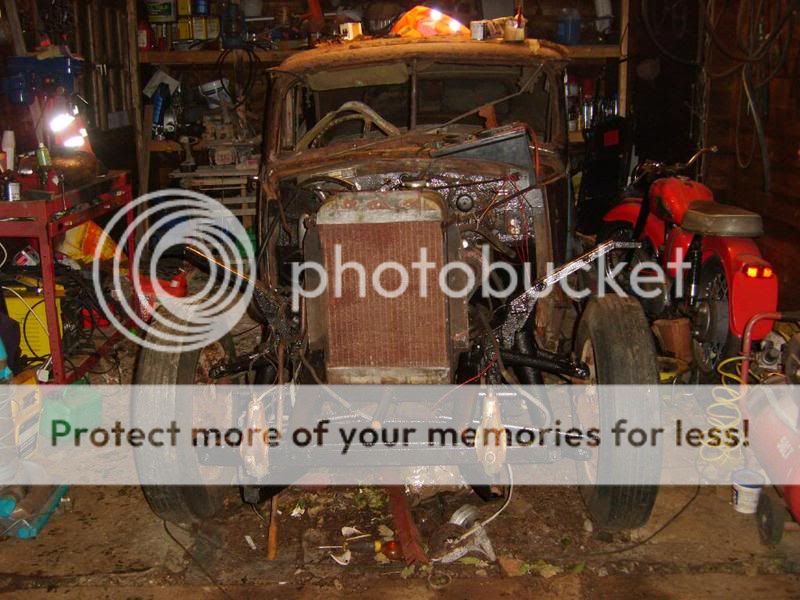
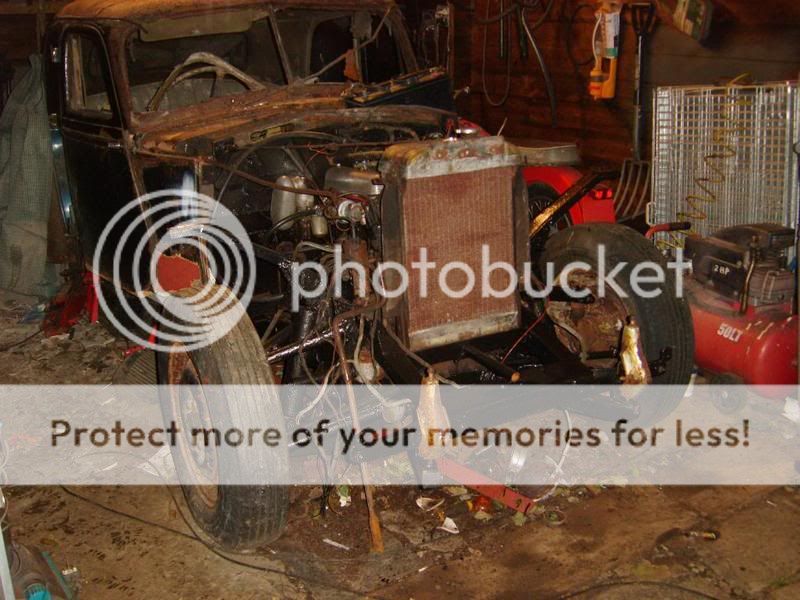
And finally back together, I'll need to tidy things up and hunt down new hoses etc but for this stage of the resto the old ones will do. You may also notice I've been getting about the chassis and bulk head a bit with a scraper, wire brush and trusty old Hammerite, all has been solid so far apart from a little plating to the bulk head which I'll show soon but I digress.
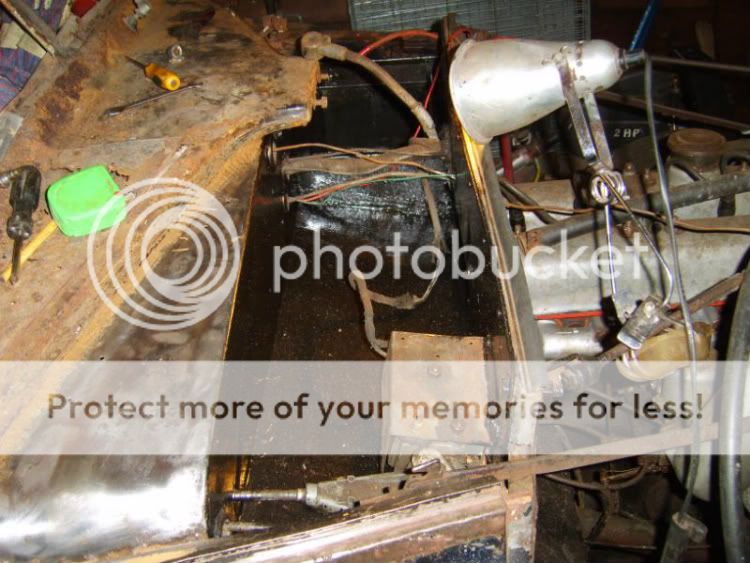
With water in the cooling sytem, the old points and distributor cap cleaned up, new spark plugs and the lovely old SU carb topped up with oil and the slide persuaded back to life with a little penetrating spray and TLC it was time for an oil change, battery and some fuel.
A new fuel line from fuel pump to carb was fitted, and a petrol can and some fuel line served as a fuel tank, which can just be made out in the photo along with my ever willing helper...
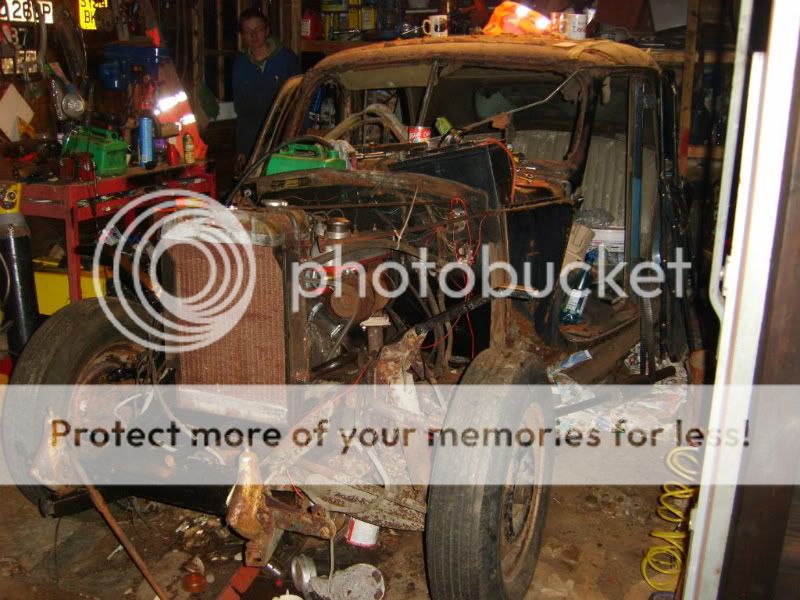
I initially had concerns about compression as the engine was a little too easy to turn on the cranking handle, I did however hope this would be due to rings sticking in the piston grooves after being stuck for so long, Optimism told me all may be well.
Anyway, after turning the engine over on the cranking handle to get the oil flowing, it was time to see what happened, the starter worked off the button, and after a few false starts of spluttering and a little more attention to the carb she went. Saturday 22 October 2011, saw the end of a thirty year sleep for the Riley engine, she runs sweet, with good oil pressure, the tappet clearences did loosen off a bit, but after getting her good and hot the head bolts were torqued back up, and tappets set again.
The compression worry has also gone, and I think the sticking rings theory was right, she now sucks and puffs like a good un when cranking her over on the handle.
I think its time she got a name after that, I'm thinking of "Rusty" at the moment. Alright, so I've barely scraped the surface so far but I feel like we're making progress.
With water in the cooling sytem, the old points and distributor cap cleaned up, new spark plugs and the lovely old SU carb topped up with oil and the slide persuaded back to life with a little penetrating spray and TLC it was time for an oil change, battery and some fuel.
A new fuel line from fuel pump to carb was fitted, and a petrol can and some fuel line served as a fuel tank, which can just be made out in the photo along with my ever willing helper...
I initially had concerns about compression as the engine was a little too easy to turn on the cranking handle, I did however hope this would be due to rings sticking in the piston grooves after being stuck for so long, Optimism told me all may be well.
Anyway, after turning the engine over on the cranking handle to get the oil flowing, it was time to see what happened, the starter worked off the button, and after a few false starts of spluttering and a little more attention to the carb she went. Saturday 22 October 2011, saw the end of a thirty year sleep for the Riley engine, she runs sweet, with good oil pressure, the tappet clearences did loosen off a bit, but after getting her good and hot the head bolts were torqued back up, and tappets set again.
The compression worry has also gone, and I think the sticking rings theory was right, she now sucks and puffs like a good un when cranking her over on the handle.
I think its time she got a name after that, I'm thinking of "Rusty" at the moment. Alright, so I've barely scraped the surface so far but I feel like we're making progress.
Re: BRAVE or just FOOLISH RM RESTO
Excellent work. It's always a great feeling when something that hasn't run for years finally fires up and runs sweet as, makes it all worth while.
Re: BRAVE or just FOOLISH RM RESTO
Cheers Rob, it's these moments that make you want to get on despite knowing what youll find elsewhere isn't it
Just off to finish painting the front of the chassis & running gear, will update soon
Just off to finish painting the front of the chassis & running gear, will update soon
Re: BRAVE or just FOOLISH RM RESTO
While I was waiting on the head gasket I decided to have a go at some easy stuff as a bit of progress always inspires getting on with the more serious stuff.
As mentioned earlier I've been getting around the front end of the car with a scraper and wire brush in order to get rid of some rust and start tidying / protecting some of the more accesible bits.
Fortunately here the only thin metal was restricted to a small area of the bulkhead, I only wish the rest of the car was like that.
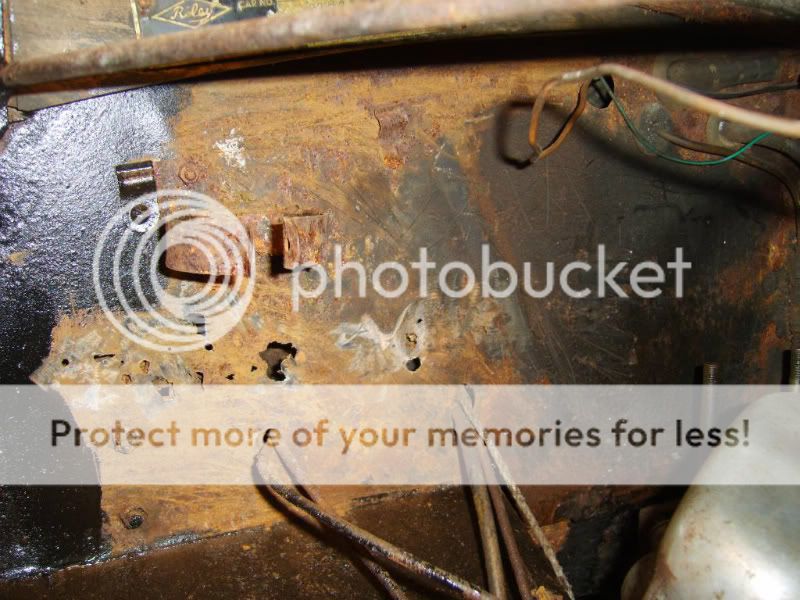
Not too bad at all, so a small plate letterboxing in all that is needed. You can make out behind the bulkhead that the horizontal panel that runs across the car over the footwells needs rather more attention, that will be the next job I think as I'm itching to do some bodywork.


Tacked and then stitch welded
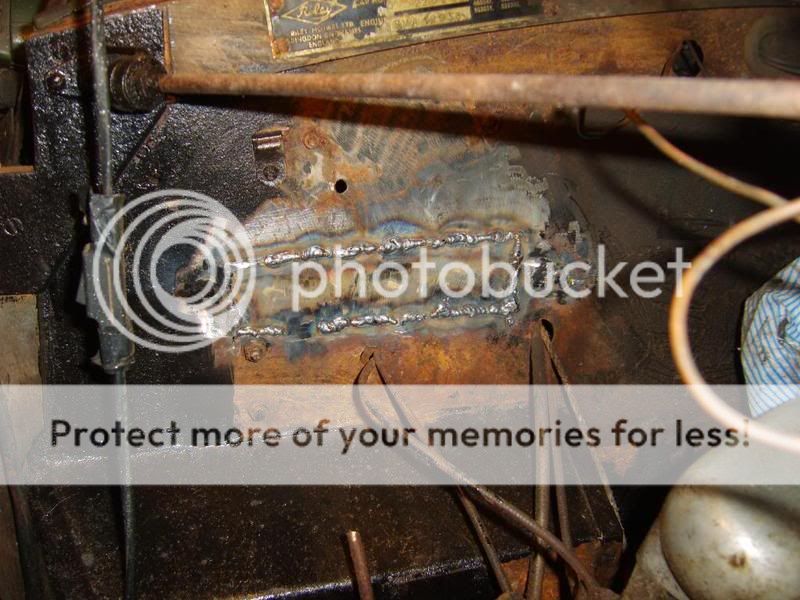
and ground
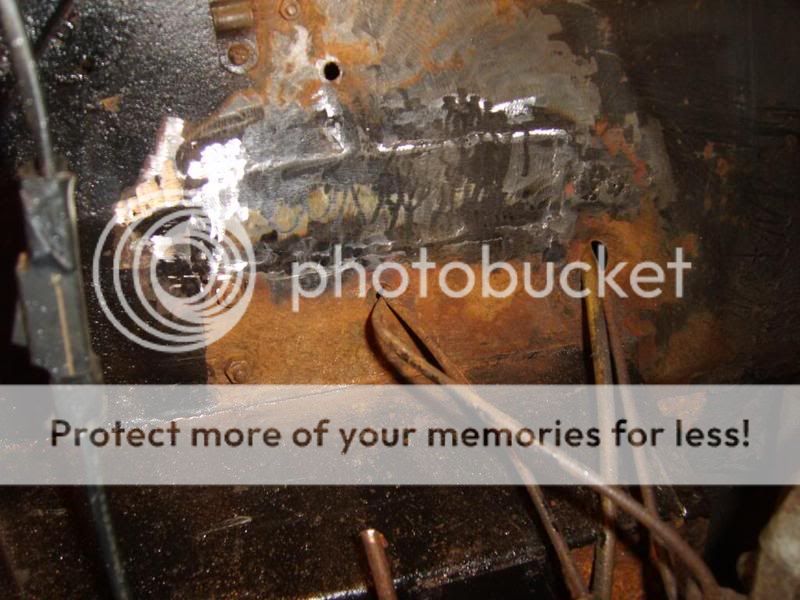
I actually dressed it a little further than the photos show but then got carried away and forgot about the camera
After some more scraping and painting I'm happy enough here for now, I need to get underneath properly to finish one or two less accesible bits but I'll come back to this part in the future and tackle that along with brakes, check / paint / grease trunnions, wheel bearings etc all as one job.

As mentioned earlier I've been getting around the front end of the car with a scraper and wire brush in order to get rid of some rust and start tidying / protecting some of the more accesible bits.
Fortunately here the only thin metal was restricted to a small area of the bulkhead, I only wish the rest of the car was like that.
Not too bad at all, so a small plate letterboxing in all that is needed. You can make out behind the bulkhead that the horizontal panel that runs across the car over the footwells needs rather more attention, that will be the next job I think as I'm itching to do some bodywork.
Tacked and then stitch welded
and ground
I actually dressed it a little further than the photos show but then got carried away and forgot about the camera
After some more scraping and painting I'm happy enough here for now, I need to get underneath properly to finish one or two less accesible bits but I'll come back to this part in the future and tackle that along with brakes, check / paint / grease trunnions, wheel bearings etc all as one job.
Re: BRAVE or just FOOLISH RM RESTO
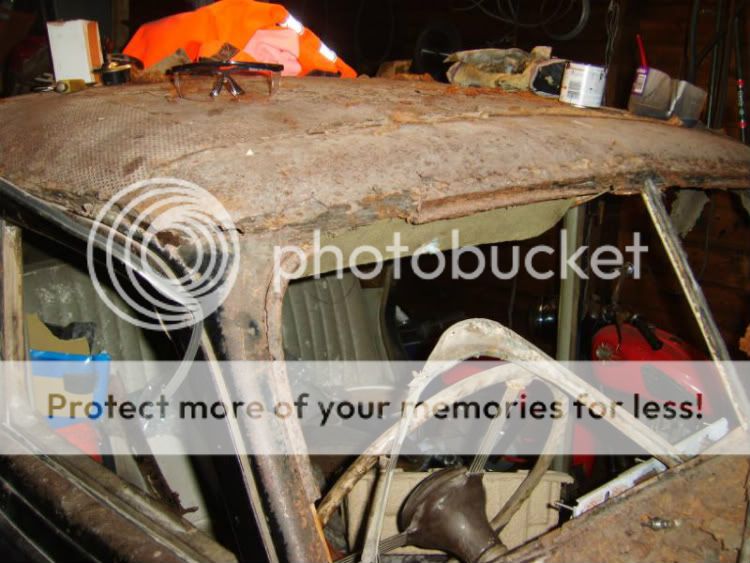
Just a few photos of the bits I'm planning on doing next, If I get them done o.k then I think the rest of the project will go o.k.
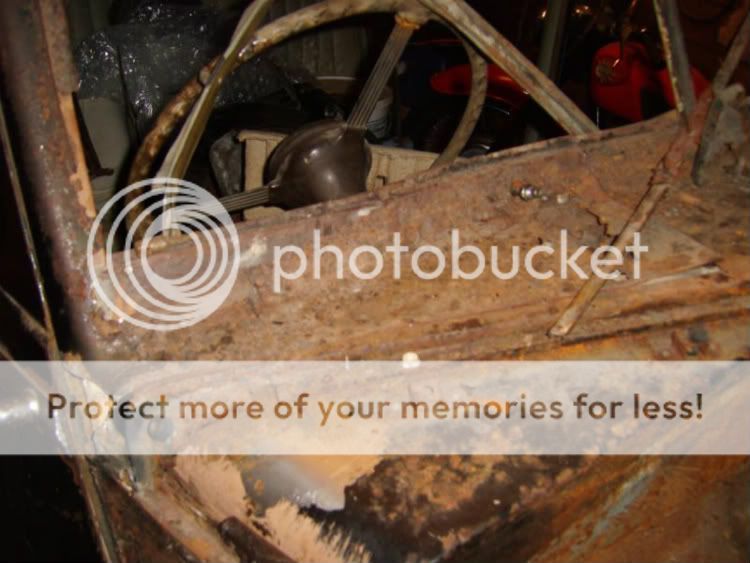
The first one is a simple enough repair, a simple tray type panel that runs across the drivers half of the car above the footwells.

That should prove pretty simple, but then it leads onto the windscreen surround and pillars, which will be a bit involved to get a satisfactory result, I suspect some timber frame work is also on the cards.

I wont be able to keep very much of the original at all, so it should be fun. In truth I think this is the worst part of the car, so if I get anything like a satisfactory outcome I'll be made up. A complete replacement panel would be the better option, but I don't think I'll find one anytime soon at a price I can afford, so I think we will just have to see how it goes.
The first one is a simple enough repair, a simple tray type panel that runs across the drivers half of the car above the footwells.
That should prove pretty simple, but then it leads onto the windscreen surround and pillars, which will be a bit involved to get a satisfactory result, I suspect some timber frame work is also on the cards.
I wont be able to keep very much of the original at all, so it should be fun. In truth I think this is the worst part of the car, so if I get anything like a satisfactory outcome I'll be made up. A complete replacement panel would be the better option, but I don't think I'll find one anytime soon at a price I can afford, so I think we will just have to see how it goes.
Re: BRAVE or just FOOLISH RM RESTO
Hi,
Good luck. This reminds me of my failed resto of a 1952 1 1/2 lt RME, back in the 80's! Yours looks a bit rougher than mine did.
I found during stripping the job was far beyond my skill/knowledge.
I have just started the restoration of a peugeot 403, 1958 saloon, petrol.
I've just joined the forum and have advertised a few books on the RME. You might be interested.
Re: BRAVE or just FOOLISH RM RESTO
Thanks, hope the new project goes better for you. What are you looking for on the Riley books, bearing in mind I'm from Lancashire originally and so as tight as they come  (and skint)
Re: BRAVE or just FOOLISH RM RESTO
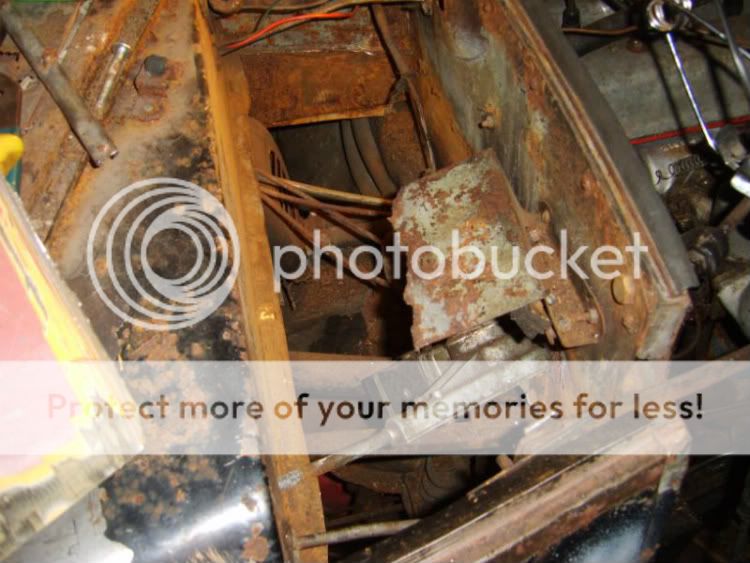
Anyway, a bit of an update is due. I've been tackling the footwell top panel and battery tray.
This is it coming out
The new one,

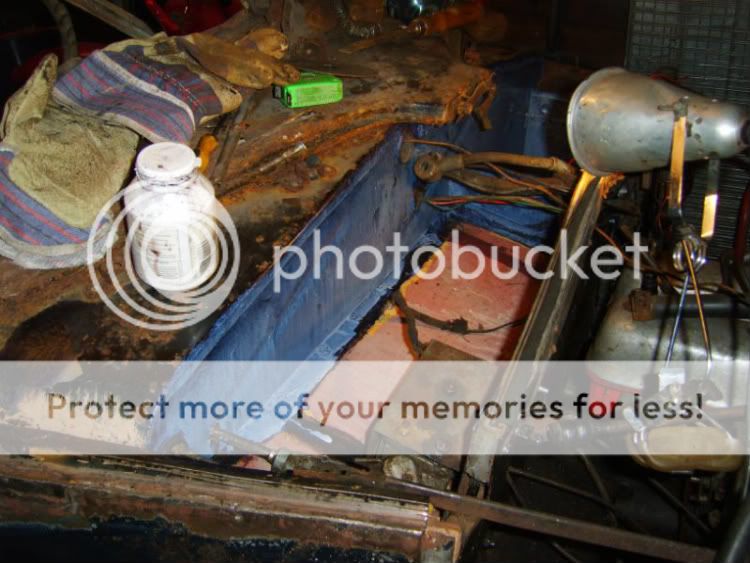
And in position, not a lot of welding required here and I still put more on than the original was held with

A good wire brushing and then some rust converter
Same for the battery tray which was amazingly sound considering the thick layer of battery acid gunk it was covered with
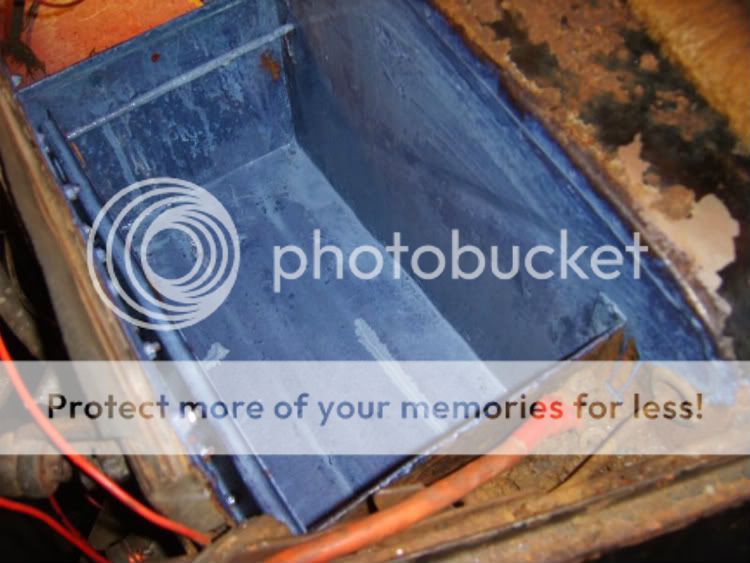
And then some more Hammerite, don't worry, I'm not going to cover the car in the stuff but do like it for areas like these and will paint over it when I spray the car.
So, I have now moved on to the slightly more difficult task of the windscreen surround.
This is it coming out
The new one,
And in position, not a lot of welding required here and I still put more on than the original was held with
A good wire brushing and then some rust converter
Same for the battery tray which was amazingly sound considering the thick layer of battery acid gunk it was covered with
And then some more Hammerite, don't worry, I'm not going to cover the car in the stuff but do like it for areas like these and will paint over it when I spray the car.
So, I have now moved on to the slightly more difficult task of the windscreen surround.