Page 8 of 13
Re: Austin A35 Project
Posted: Mon Apr 18, 2022 9:01 pm
by gazza82
Dick wrote: ↑Thu Mar 31, 2022 11:04 am
gazza82 wrote: ↑Wed Mar 30, 2022 7:46 pm
There is a conversion in progress where the owner is fitting the shell to an MX5 chassis .. to the body will need to be widened to fit! That's going to upset a few ..

Id love to see that

This was posted up today ... Mx35 !?!?
- FB_IMG_1650315411958.jpg (63.31 KiB) Viewed 2798 times
For those who use FB ...
https://www.facebook.com/groups/A30A35A ... 502380871/
Re: Austin A35 Project
Posted: Mon Apr 18, 2022 9:07 pm
by Dick
gazza82 wrote: ↑Mon Apr 18, 2022 9:01 pm
Dick wrote: ↑Thu Mar 31, 2022 11:04 am
gazza82 wrote: ↑Wed Mar 30, 2022 7:46 pm
There is a conversion in progress where the owner is fitting the shell to an MX5 chassis .. to the body will need to be widened to fit! That's going to upset a few ..
Id love to see that
This was posted up today ... Mx35 !?!?
FB_IMG_1650315411958.jpg
For those who use FB ...
https://www.facebook.com/groups/A30A35A ... 502380871/
.
Love it! Thanks, the fb link isn't working though
Re: Austin A35 Project
Posted: Tue Apr 19, 2022 6:25 pm
by gazza82
.
Love it! Thanks, the fb link isn't working though
[/quote]
You might need to join the group.
Re: Austin A35 Project
Posted: Tue Apr 19, 2022 8:39 pm
by Dick
Thanks, spotted a couple of a 35 projects recently...
Re: Austin A35 Project
Posted: Tue May 03, 2022 7:30 pm
by gazza82
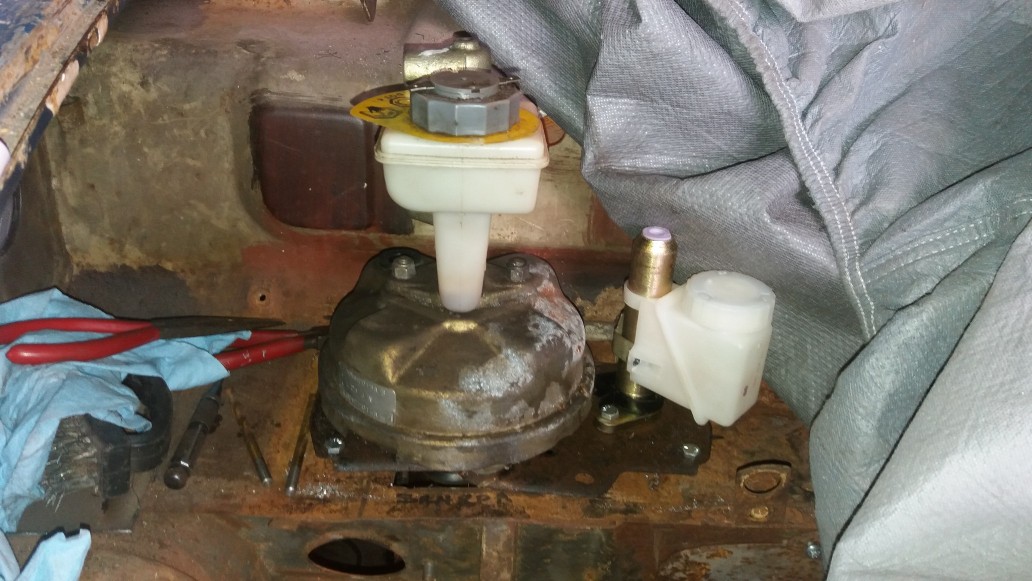
So still working on the brakes and clutch pedal .. have now incorporated a 3mm mild-steel plate beneath the trimmed down Metro plate as advised by a couple of Owners' Club members who have made the same modification. The battery tray isn't that stiff apparently and even less when you've chopped a small section out with two of the stiffening indents.
- Metro_master_cylinders.jpg.jpg (150.7 KiB) Viewed 2696 times
You can see the Metro plate here and I'm now mounting the servo the other way around with the two outlets on the right so pipes all run bewteen the two masters for neatness. I've also got hold of two rear brake restrictors that are fitted to the Metro that hopefully will stop the rear brakes locking up prematurely.
This weeks task is to cut two holes in the 3mm plate .. one at 60mm diameter and one at 32mm. Also to paint that Metro plate. Then a last check for fit and weld in the plate to the bodyshell. Then I'll turn my attention to the bulkhead and pedal brackets to reduce flexing there too. A couple of "indents" in the bulkhead to work around .. that's where the steering balljoints move so it's been relieved by a "small enlongated dome" which I need to leave. Cornflake packet at the ready!
Re: Austin A35 Project
Posted: Mon May 23, 2022 6:37 pm
by gazza82
This weeks task is to cut two holes in the 3mm plate .. one at 60mm diameter and one at 32mm. Also to paint that Metro plate. Then a last check for fit and weld in the plate to the bodyshell.
The two holes were relatively easy to cut .. bought a couple of hole cutters and arbor from my local Toolstation. (the Abracs ones with cobalt)
And the Metro plate is also now a nice satin black colour. (Also fitting it with some nice black socket button headed screws!).
So the welding was next .. and it didn't go that well ... but then I was told to up the wire speed by someone who knows. I also found that the tip was a bit "manky" and the wire was catching which was probably why I couldn't get a nice wire feed.
Miracles of miracles .. a new tip and wire speed of 6 .. and it worked! I now have some reasonable welds holding that plate to the original battery tray.
So today I decided to clean up the "mess" that I made first and reweld a bit more when ....
... the welding wire ran out!!

Re: Austin A35 Project
Posted: Tue May 31, 2022 8:20 pm
by gazza82
Rather wet today so didn't think welding in a car port would be a great idea ...
So started to wear out a few wire brushes ...
- 20220531_170453_copy_2064x1161_copy_825x464.jpg (80.05 KiB) Viewed 2624 times
Missed a couple of bits .. I know!
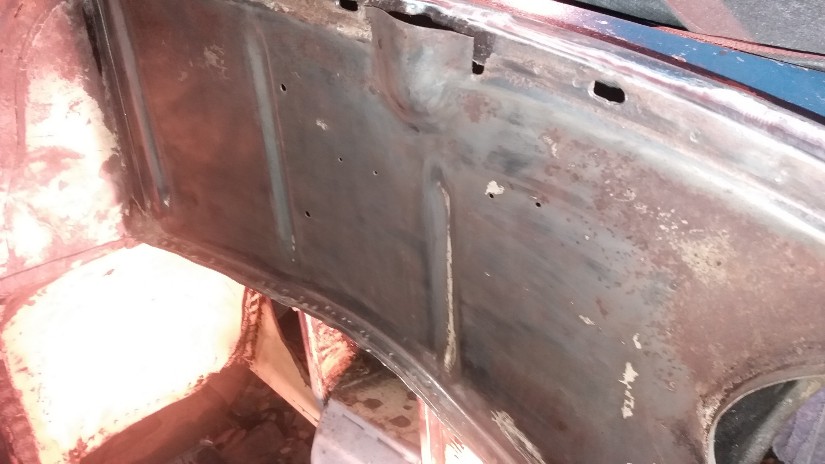
And get the back gunk called underseal off ... which involved scrapers and white-spirit .. and elbow grease ..
- 20220531_170443_copy_1161x2064_copy_464x825.jpg (93.97 KiB) Viewed 2624 times
That inner wing/wheel arch had a fairly large dent in the side .. you can probably just make out the creases. A large hammer and block and plenty of noise and it was almost flat again.
The plan is to Raptor all the undersides eventually.
Re: Austin A35 Project
Posted: Tue Mar 21, 2023 2:22 am
by gazza82
I'll add an update in the next couple of days .. just need to sort out the pictures but since my last update several areas of metal have been cut out and replaced and I've destroyed a number of flap discs and wire brushes!

Re: Austin A35 Project
Posted: Tue Mar 21, 2023 8:08 am
by Luxobarge
Excellent, looking forward to it. These are the kinds of threads I've missed the most. Cheers
Re: Austin A35 Project
Posted: Wed Mar 22, 2023 4:33 pm
by gazza82
Went at floor with angle grinder .. there was a large "L" shaped rust hole where they fitted a steel box under the floorpan to transport the shell ion the production line. This is a known detritus trap and slowly rusts away
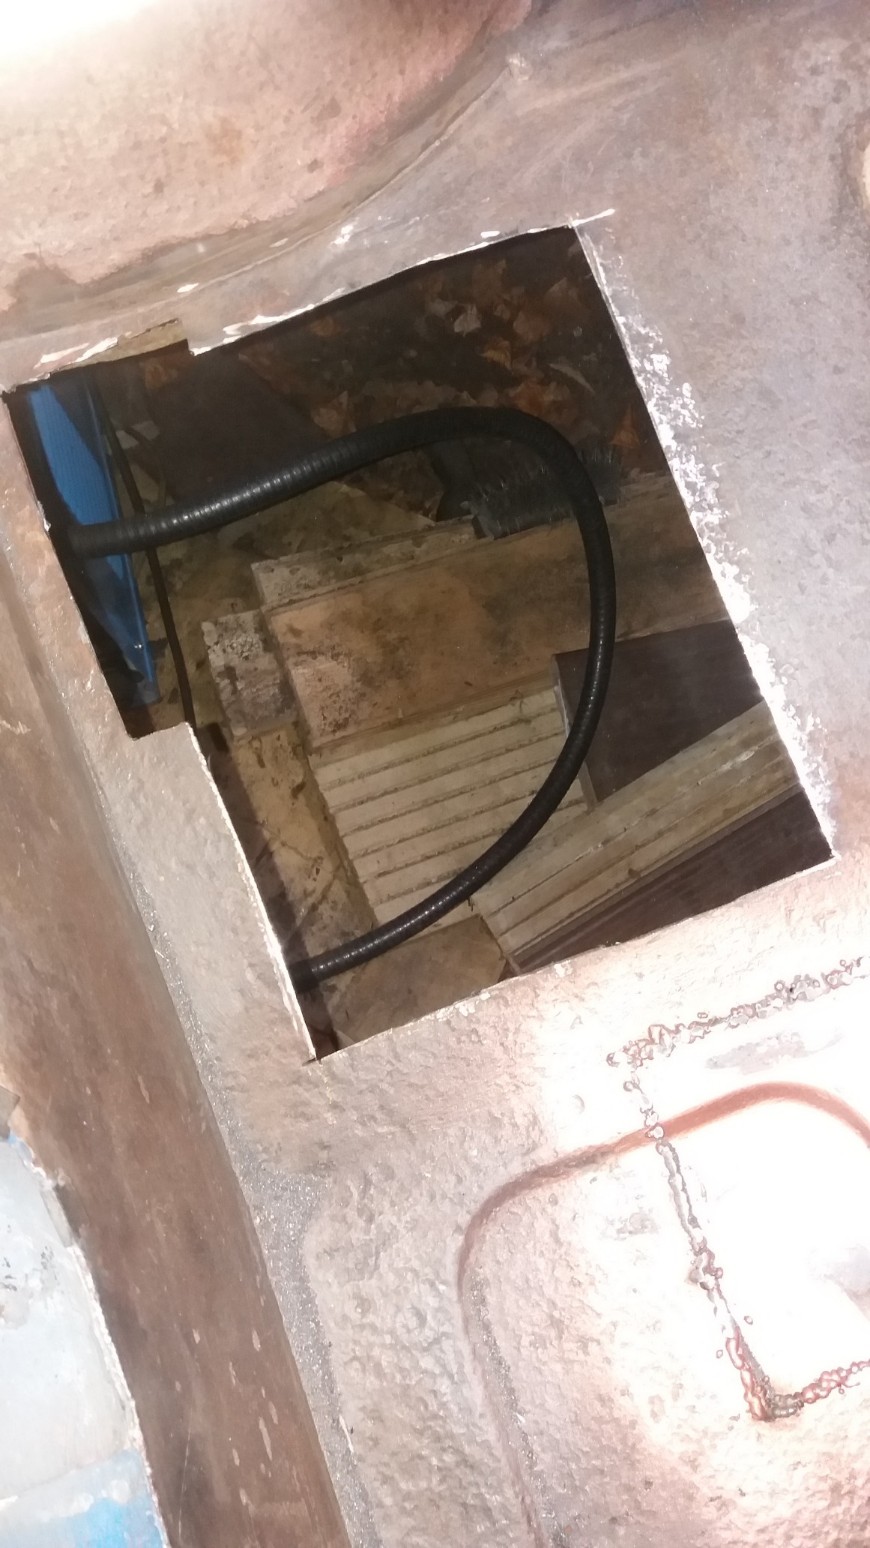
- 20221212_152626_copy_1161x2064_copy_870x1548.jpg (241.05 KiB) Viewed 2523 times
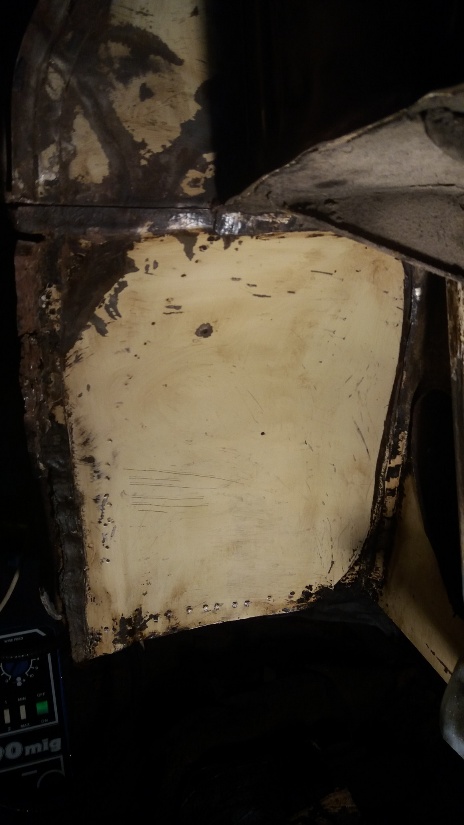
Then added in some new metal
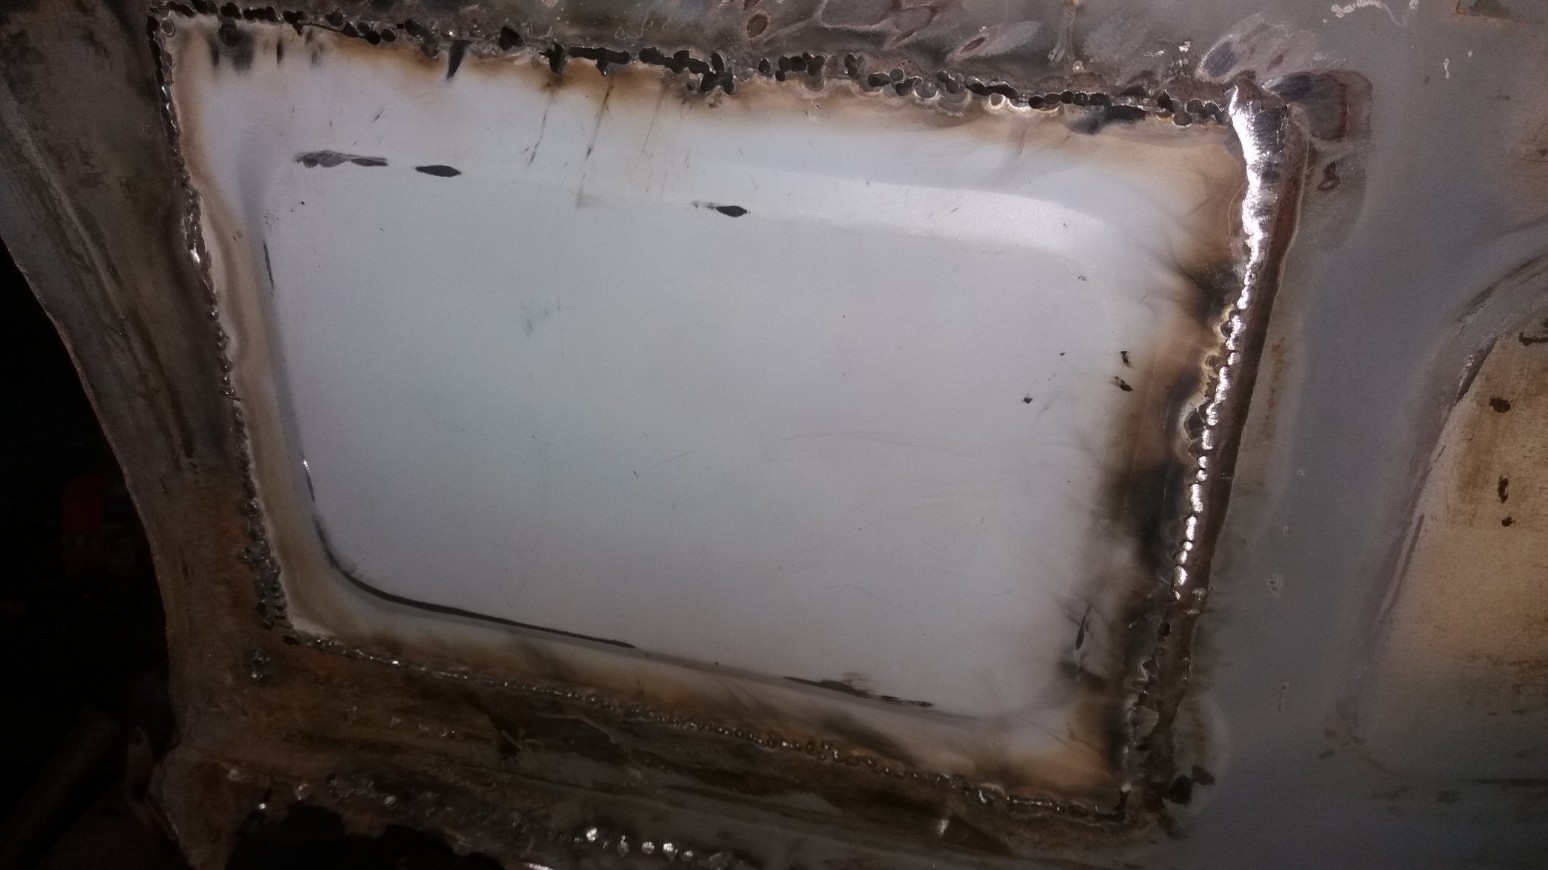
- 20230107_121827_copy_2064x1161_copy_1548x870_1.jpg (194.02 KiB) Viewed 2523 times
Had to do this on both sides but rather than chop out the whole floor section I just cut out the depressions and a small edge and welded it in. On the passenger side the rust had also started a bit further back too leaving lots of pin holes, so that has also been sorted. You can probably see the new patch in the first picture .. it's actually a corner from the driver's side floor that was in better condition and had already been cut out and replaced with new metal. Waste not, want not!
Have now started to grind off several layers of primer and paint from front panel and front wings but it is not kind to the discs ..

- 20230227_161045_copy_2064x1161_copy_825x464.jpg (160.43 KiB) Viewed 2523 times
(or probably the environment

.. 'Elf & Safety means I wear a good multi-filter mask and snug fitting goggles to keep ME safe!

)
May need more than the five purple coloured discs for my 100mm diam grinder I've already bought as I still have to do from B-posts back and boot lid. Luckily bonnet is replacement and primered.
There is a lot of rusty metal in the front panel where the wings bolt to down the front. Sills need to be completely replaced and I know there is more rust to be cut-out in the shaped rear 3/4s.