Needed a job that kept me out of the rain ... so stripped down the back axle.
First up was to pull the halfshafts and mark them L & R (these aren't going back as I have a couple of sets of Spridget halfshafts which are hardened)
Largest socket I has was 36mm ... so ... used a large adjustable wrench to remove the hub nuts. By fitting the wrench tightly across the nut flats and tapping the end managed to loosen the nuts. Remembering one is a left-hand thread and the other right.
Getting the hubs off is a challenge as there isn't anything to press against as the axle is hollow so I found a couple of small offcuts of 3mm thick steel and laid these over the end of the axle to press against. That pulled the hubs to the end and drifted the hub off gently from behind (through the handbrake rod hole in the back plate and rotating the hub a few degrees after each tap).
Impact driver made quick work of the backplate mounting nuts and bolts and the diff mounting nuts. All sitting in Jizer now for a good clean up.
Evidence of slight rusting behind and under the hub seals on both sides and one drain hole was completely blocked.
Next up is to clean up the surface rust on the outer surfaces where the rear axle oil didn't make it to from behind the diff seal!! :whistle:
Note: the old Jizer I had in the garage and bought back in 2017 was a pink-colour and quite a strong (but not unpleasant) smell. The new stuff (same can) is clear and not as smelly but is as effective .. which is unusual for modern chemicals after the EU changed all the rules.
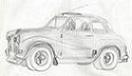
Austin A35 Project
Re: Austin A35 Project
"If you're driving on the edge ... you're leaving too much room!"
Retirement Project: '59 Austin A35 2-door with 1330cc Midget engine and many upgrades
Said goodbye: got '98 Alfa Romeo 156 2.0 TSpark to 210K miles before tin worm struck
Retirement Project: '59 Austin A35 2-door with 1330cc Midget engine and many upgrades
Said goodbye: got '98 Alfa Romeo 156 2.0 TSpark to 210K miles before tin worm struck
Re: Austin A35 Project
I'm needing something to clean the caked on grease covering my jcb.. do you think jizer would help? I've got a steam cleaner which is pretty good but this stuff has set like concrete...
Re: Austin A35 Project
Worth a try .. even if it only softens it ...
Then again at the price of it (over £30 per 5l), you may find petrol cheaper!
"If you're driving on the edge ... you're leaving too much room!"
Retirement Project: '59 Austin A35 2-door with 1330cc Midget engine and many upgrades
Said goodbye: got '98 Alfa Romeo 156 2.0 TSpark to 210K miles before tin worm struck
Retirement Project: '59 Austin A35 2-door with 1330cc Midget engine and many upgrades
Said goodbye: got '98 Alfa Romeo 156 2.0 TSpark to 210K miles before tin worm struck
Re: Austin A35 Project
Over the past few days I've drifted the old bearings and seals out of the rear hubs, cleaned them thoroughly and give them a coat of paint on the outside. New bearings and tab washers arrived a couple of days ago, to go with the seals and gaskets I've had in the spare box for a while, so I'll be rebuilding those in the next few days. Got to work out which way the seals go as these seem to have two inner 'lips' rather that the one on the original .. so they may go in either way.
Also painted up the steering box externals and cleaned the outside of the alloy idler with some very fine wet&dry. Gave the latter a coat of lacquer to try and keep it looking clean too! I just need to make a couple of new paper gaskets for idler and also for steering box and clean or replace the cover screws.
Still haven't fully cleaned up the axle casing as the rain keeps coming and going .. it's rusty enough without additional moisture.
I also had another go at the rear propshaft UJ. I couldn't get one circlip in the yoke groove. A bearing cup would not seat fully and my hunch was right as to why. Three of the needles from the bearing had fallen down preventing the UJ from seating.
So tapped/pulled them all out, gave each a bit more grease, relocated and checked the needles were in place and tried again. A couple more failed attempts as any slight knock dislodged at least one needle but, with a combination of the vice, a G-clamp, some small sockets and a lot of patience, eventually managed to seat all four and fit the circlips. Job done! Only started that in Oct 2022
"If you're driving on the edge ... you're leaving too much room!"
Retirement Project: '59 Austin A35 2-door with 1330cc Midget engine and many upgrades
Said goodbye: got '98 Alfa Romeo 156 2.0 TSpark to 210K miles before tin worm struck
Retirement Project: '59 Austin A35 2-door with 1330cc Midget engine and many upgrades
Said goodbye: got '98 Alfa Romeo 156 2.0 TSpark to 210K miles before tin worm struck
Re: Austin A35 Project
Finally found some time to clean up the stub axles (swarf) and install the kingpin tubes and grease nipples. Put some thin roller bearings in place of the bronze washers that are normally under the top trunnions.
Need to clean up the thread on one stub axle to fit the hub nuts then install the new hub bearings. Going for tapered rather than the ball-bearings normally used.
And one more job done on the body which was to bond in a strip of steel along the bottom edge of the rear panel at the rear of tge boot. It will be hidden behind sound-proofing matting I plan to fit. I can now run a thin coat of filler across the back to fill the holes from rust and removing the valance panel that sits behind the bumper. Gives the filler a base. Planning also to drill some drainage holes to try to stop further corrosion here as it is a rust trap. Also bonded in a small piece where it had rusted away at the bottom edge of the inner rad panel in the engine bay. Getting a mig welder in there would be fun as it is double-skinned. Another clever rust trap!
Slowly eating this particular elephant one small bite at a time
"If you're driving on the edge ... you're leaving too much room!"
Retirement Project: '59 Austin A35 2-door with 1330cc Midget engine and many upgrades
Said goodbye: got '98 Alfa Romeo 156 2.0 TSpark to 210K miles before tin worm struck
Retirement Project: '59 Austin A35 2-door with 1330cc Midget engine and many upgrades
Said goodbye: got '98 Alfa Romeo 156 2.0 TSpark to 210K miles before tin worm struck
Re: Austin A35 Project
There was another little update I meant to post.
A day or two ago I removed the door panel from the driver's door for three reasons:
1) my wife wanted reminding what the A35's original colour was. The inside of the door is the ideal place to check as it's relatively clean and not bothering to paint in there when it was repainted over 45 years ago. We're debating what colour it is going to be next. Sequence so far is: Court Grey (which is a cream colour and my car came in about twenty different shades of it), White, then what was called LeMans Blue by the company who supplied the paint in the 70s. Next? That's definitely the one called "Wait and See"
2) I wanted to see what state the hardboard was in ... I remade these in the 70s and was half expecting to make a new set now but they seem ok and fill just need recovering. Apart from one panel on the rear which was nibbled by the mice. They chomped through the vinyl cover, thin foam padding and into the hardboard
3) in a post on our Club's forum, our Technical Officer mentioned a small ball bearing that should be located in the lifting arm of the window. Remember on the A30 and A35 didn't have winders but they were pushed up and pulled down by hand!! So I thought I'd have a look to confirm my suspicions that mine had gone awol ... it has. If the ball drops out it is going to disappear into a box section at the bottom of the door and it then probably going to find an escape route through the drainage holes. Result? Order for ten 5.5mm steel bearing balls .... (that way I'll have some spares as you can bet the passenger one is also missing and for when I drop more down into the door rebuilding them!!)
Having removed the door panel though has added another job to the long list I already have. The rear window channel that runs across the door and down the shutting edge is missing about two inches having rusted away. I might be lucky though as these are the same of both sides and I have a spare passenger door that only saw service for about 12 years. I'm hoping that one is intact. Looking at the procedure for disassembly and reassembly though is not for the faint-hearted! There isn't a lot of room to work or manouever your hands in these doors and Austin used a lot of small screws and even more rivets to hold it all together. They will need to be stripped down to replace the rubbers and runner felt plus there is some metal work that will be needed on the driver's door at the bottom. Remember I mentioned drain holes .. looks like mine got blocked at some point in it's early life and the damage was done
"If you're driving on the edge ... you're leaving too much room!"
Retirement Project: '59 Austin A35 2-door with 1330cc Midget engine and many upgrades
Said goodbye: got '98 Alfa Romeo 156 2.0 TSpark to 210K miles before tin worm struck
Retirement Project: '59 Austin A35 2-door with 1330cc Midget engine and many upgrades
Said goodbye: got '98 Alfa Romeo 156 2.0 TSpark to 210K miles before tin worm struck
Who is online
Users browsing this forum: No registered users and 30 guests