Post pictures and stories about your cars both present and past. Also post up "blogs" on your restoration projects - the more pictures the better! Note: blog-type threads often get few replies, but are often read by many members, and provide interest and motivation to other enthusiasts so don't be disappointed if you don't get many replies.
-
kstrutt1
- Posts: 516
- Joined: Sat Oct 22, 2011 8:55 pm
- Location: essex
#371
Post
by kstrutt1 » Fri Oct 16, 2015 9:54 pm
New metal was then welded into the arch and the outer arch fitted, once this was done the c pillar was cut back to sound metal.

- rps20151016_223706.jpg (36.04 KiB) Viewed 1991 times

- rps20151016_223800.jpg (39.46 KiB) Viewed 1991 times
.
So the bulk of it is now repaired, I just have the base of the c pillar and a couple of flanges to replace.
-
TerryG
- Posts: 6754
- Joined: Wed Jan 05, 2011 1:54 pm
- Location: East Midlands
#372
Post
by TerryG » Sun Oct 18, 2015 10:10 am
That is very familiar. I am quite jealous of how neat your welding is and how quickly you are getting it done.
I'm off outside now to do my drivers side rear sill / body mount
Understeer: when you hit the wall with the front of the car.
Oversteer: when you hit the wall with the back of the car.
Horsepower: how fast you hit the wall.
Torque: how far you take the wall with you.
-
kstrutt1
- Posts: 516
- Joined: Sat Oct 22, 2011 8:55 pm
- Location: essex
#373
Post
by kstrutt1 » Sun Oct 18, 2015 6:00 pm
Another couple of hours on the range rover, c post and inner wing are all done.
A bit more of the post had rusted this side, I ended up replacing the area around the striker as well which involved making a new cage for the nut etc.

- rps20151018_184655.jpg (43.1 KiB) Viewed 1958 times

- rps20151018_184750.jpg (25.28 KiB) Viewed 1958 times

- rps20151018_184903.jpg (33.76 KiB) Viewed 1958 times
Just need to add the flange between the inner and outer arch then this area is done.
Then a small repair around the base of the fuel filler neck (the floor looks worse than it is).

- rps20151018_185025.jpg (27.69 KiB) Viewed 1958 times
-
kstrutt1
- Posts: 516
- Joined: Sat Oct 22, 2011 8:55 pm
- Location: essex
#374
Post
by kstrutt1 » Mon Oct 19, 2015 9:45 pm
Welding on the right hand rear corner is all done, just needs the welds cleaning up and painting now, then I will move forward along the sills to the front body mounts (they are only just begining to go but with sills off are pretty easy to replace) and finally up the a pillar to the kick panel, priority is to get it mot worthy so the sills and body mounts need to be done before the end of this year.
-
kstrutt1
- Posts: 516
- Joined: Sat Oct 22, 2011 8:55 pm
- Location: essex
#375
Post
by kstrutt1 » Thu Oct 22, 2015 8:15 pm
The rh rear corner of the rr is now more or less completed, just need to underseal the wheelarch over the weekend.
Welding completed primed and sealed, with wheelarch and area behind wing painted in black stone chip.
Behind the wing
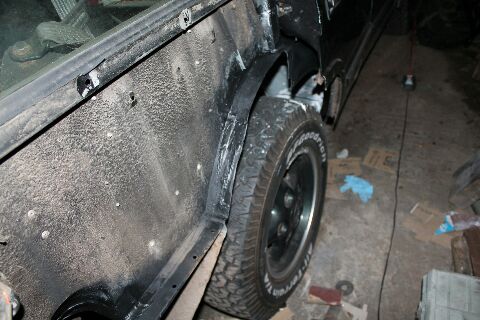
- rps20151022_210500.jpg (37.82 KiB) Viewed 1918 times
Around the fuel filler

- rps20151022_210542.jpg (30.01 KiB) Viewed 1918 times
In the door shut

- rps20151022_210617.jpg (28.13 KiB) Viewed 1918 times
Inside, complete with dribble of sealer!

- rps20151022_210702.jpg (24.04 KiB) Viewed 1918 times
Just need to paint the interior and put the trim back together then I can get onto replacing the outer sills in a couple of weeks time, I have cut the metal out allready so it just needs forming, then chop up so e 4mm for the front body mount weld it all together.
-
kstrutt1
- Posts: 516
- Joined: Sat Oct 22, 2011 8:55 pm
- Location: essex
#376
Post
by kstrutt1 » Fri Oct 23, 2015 3:28 pm
Put the trim back in at lunch time and fitted a new air meter to plenum hose (the old one was split), also took a look at the cd multi changer while it was out, turns out if you plug it into the head unit directly it works fine so the problem is the cable, I will move it to under the passenger seat and just extend the cable on the changer doing away with the extension cable all together.
-
kstrutt1
- Posts: 516
- Joined: Sat Oct 22, 2011 8:55 pm
- Location: essex
#377
Post
by kstrutt1 » Fri Oct 23, 2015 7:33 pm
I have just taken the cd changer cable out and the issue is obvious, it has been trapped under the sill trim and cut, I will just cut a couple of feet out and join it back together.
Also the outside handle on the rh rear door has stopped working! 2 steps forward, one back! It feeks like the rod has dropped off, just hoping the handle has not broken.
I have also knocked the dent out of new rust free door I picked up foir next to nothing, not perfect Because the area is double skinned but a thin skim of filler will sort it out now.
Also noticed for the first ime how filthy the rear of the headining is, mixture of dog hair and mud, hopefully it will clean off ok.
-
TerryG
- Posts: 6754
- Joined: Wed Jan 05, 2011 1:54 pm
- Location: East Midlands
#378
Post
by TerryG » Fri Oct 23, 2015 10:48 pm
If you fancy re-wiring it to a later standard, the cd changer cable should run up the drivers side d pillar, follow the loom along and down behind the A pillar trim. I removed my CD changer as I have an MP3 head unit and wanted the space for a decent amplifier.
Understeer: when you hit the wall with the front of the car.
Oversteer: when you hit the wall with the back of the car.
Horsepower: how fast you hit the wall.
Torque: how far you take the wall with you.
-
kstrutt1
- Posts: 516
- Joined: Sat Oct 22, 2011 8:55 pm
- Location: essex
#379
Post
by kstrutt1 » Sun Oct 25, 2015 7:50 am
As mine is a relatively low spec there is nothing under the passenger seat, so I am going to move the cd changer to there,mounted on a piece of plywood covered in carpet which fits to the brakets already there for electrical components when you have electric seats etc.
-
kstrutt1
- Posts: 516
- Joined: Sat Oct 22, 2011 8:55 pm
- Location: essex
#380
Post
by kstrutt1 » Sun Oct 25, 2015 7:52 am
As mine is a relatively low spec there is nothing under the passenger seat, so I am going to move the cd changer to there,mounted on a piece of plywood covered in carpet which fits to the brakets already there for electrical components when you have electric seats etc.
Also moved the minor off the ramp into it's corner yesterday, decided to put it front in and finish off all the rear end first. We also tried fitting the engine and mazda box, whereopn we struck a problem, when I measured it all up the suspension was not in now it is the starter and bell housing foul the nuts on the inboard end of the eye bolts. The ain is to kill birds with one stone, with modern tyres they work better with a bit of negatvive camber, but the standard eye bolts are a bit short to allow much adjustment. If I machine the nuts into a top hat shape with only about 5 mm of the hex left and if need be counterbore the tube in the siderail slightly it will give us more clearance and around a degree of negatve camber.
Who is online
Users browsing this forum: No registered users and 162 guests
