Alfa Romeo 75 3.0 V6 & 164 3.0 24V Cloverleaf

Post pictures and stories about your cars both present and past. Also post up "blogs" on your restoration projects - the more pictures the better! Note: blog-type threads often get few replies, but are often read by many members, and provide interest and motivation to other enthusiasts so don't be disappointed if you don't get many replies.
Post Reply
Message
Author
75nut
Posts: 151
Joined: Wed Jun 22, 2011 7:31 pm

Re: Alfa Romeo 75 3.0 V6 1991 Ongoing Project

#51 Post by 75nut » Fri Sep 07, 2012 4:30 pm

Really? I mean the underside did not HAVE to be done,I just wantto do it while the cars up.

Took today out of the office, but had to pick up my dog at 3 from vets and going out at 7 so under instructions not to get filthy again :lol: , so did not get full day in.

Boring really, scrape, wire brush, kurust and repeat!! But nearly finished and ready to start putting things back! New copper arrived for fuel pipes take 2!

Image
Image

Found a BIG hole in the engine support area! So will get some thick plate and the welder out

Image

alfaSleep
Posts: 119
Joined: Mon Nov 21, 2011 7:10 pm
Location: Wallsend-on-Tyne

Re: Alfa Romeo 75 3.0 V6 1991 Ongoing Project

#52 Post by alfaSleep » Sat Sep 08, 2012 8:30 am

lol... Hiyya , M8

'biscuit & tea' comes to mind.......

unloved examples really did just progress from dealer >> to >> breaker [with 'brown shorts' excitements, inbetween] :shock:

chr1st!!! just-rust!!

glad yrr saving (welding 98.997%) of this one :P

alfaSleep
'the french will always be there when they need you'...Monty ;<)

75nut
Posts: 151
Joined: Wed Jun 22, 2011 7:31 pm

Re: Alfa Romeo 75 3.0 V6 1991 Ongoing Project

#53 Post by 75nut » Sat Sep 08, 2012 8:40 pm

Lol, cheers mate!

Xantia-nut
Posts: 160
Joined: Thu Apr 26, 2012 3:46 pm
Location: Wolverhampton
Contact:

Re: Alfa Romeo 75 3.0 V6 1991 Ongoing Project

#54 Post by Xantia-nut » Sun Sep 09, 2012 10:34 am

Ay up!

I thought RUST = Rust, usual Sixties/Seventies trait?

Well done on this. You are a brave man. And you'll have an unusual car and make no mistake.
If in doubt, give it a clout!

If that don't work, fetch a bigger 'ammer!

1993 Citroen Xantia 1.8i LX

75nut
Posts: 151
Joined: Wed Jun 22, 2011 7:31 pm

Re: Alfa Romeo 75 3.0 V6 1991 Ongoing Project

#55 Post by 75nut » Wed Sep 12, 2012 11:32 am

Busy weekend.

Had to change oil on the wifes daily, which turned out to be a mission as some monkey massively over tightend the sump plug! I tried loads of manual tools as I was afraid my impact drive would thread it.

In the end I had to go that route with a rounded bolt socket attachement!

Used a magnetic sump plug ,don't know if they really make any difference or not really.

Image

Took my little girl for a walk after and found a car that was too gone even for me!!!

Image
Image

A Subaru Justy, the farmers here just ditch broken cars in the hedges and gullies round here.

It was time to get back to my rusty old car then

Finished Hammeriting the recently scraped and kurusted areas

Image
Image

All thats needed now is to waxoyl it all but my supplier sent the wrong type so thats on hold.

So my attention move to the rotten spare wheel well. I cut out the area, cleaned it, zinc'd it and made a template from masking tape on the cut out area and transfered to to some thick sheet.

Image
Image
Image
Image

Ground down and leaded as I dont want any filler here as its a proper rot spot!
Image
Image

BUT a complete waste of time as I have decided to drill out the spot welds and remove it altogether lol!!!

Its a massive pain to get to the rear of the Watts Linkage in the left and the rear brake caliper, wit hit removed accesss will be way better!

Il just carry the stuff in a can for punctures

75nut
Posts: 151
Joined: Wed Jun 22, 2011 7:31 pm

Re: Alfa Romeo 75 3.0 V6 1991 Ongoing Project

#56 Post by 75nut » Sat Sep 15, 2012 7:39 pm

Finally finished the first coat of waxoyl undersealing today, it will need a second but nice to see it all the same fresh black, and all the bits of crusty stuff gone!

So time to start putting stuff back on!

First up handbrake cable needed renewing while everything was off
Old
Image
New
Image
And in, simple job when everyhing is off the car
Image
I just needed to replace the rotten securing tab futher back, I have been doing this all over the car as I have been going
Image

It was time to redo my pants last attempt at fuel pipes, if you remember I made them to big and to flared and bent them badly fitting, and also had the idiotic idea of adding foam to protect the pipes. Which many immediately point out was a good way of capturing misture and getting all the rot I just got rid of back quickly :lol:

So I remade with smaller flares and exactly the same sizing, and used cut up rubber fuel pipe to protec the contact points of the copper pipe, and zip tied them further so they stay in place (unfortunately I had a choice of stupid big white zip ties or the right size in yellow)

Image
Image

All done

Image

The battery was dead, so even after adding fuel I could not test to ensure it was all working ok with no leaks etc, so that will have to be done tommorow.

Removed the gearlever from under the car to check out this cracking

Image

and decide if I wanted to cut some of the length out of the lever, but had to go spend some time with my litten by then so that was it for the day.

75nut
Posts: 151
Joined: Wed Jun 22, 2011 7:31 pm

Re: Alfa Romeo 75 3.0 V6 1991 Ongoing Project

#57 Post by 75nut » Fri Oct 12, 2012 3:43 pm

Not updated in a while but have been working

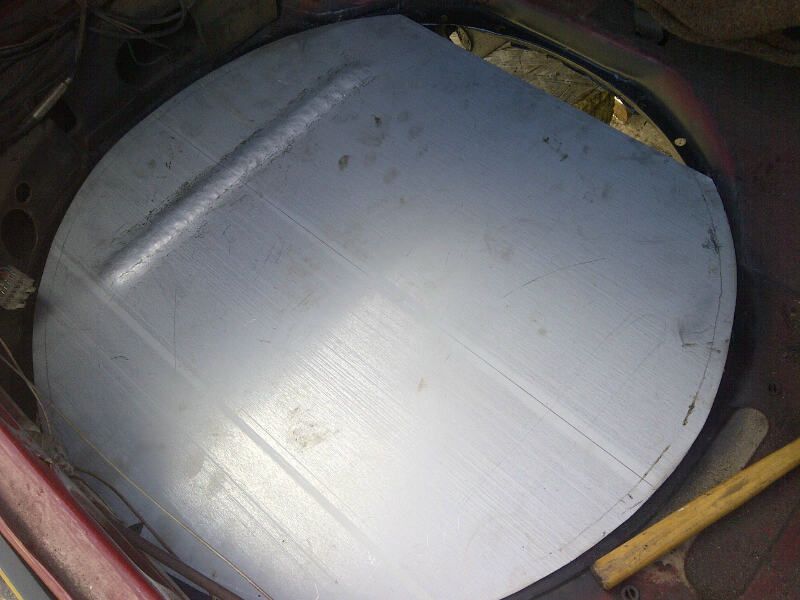
Spent it taking the spare wheel well out.

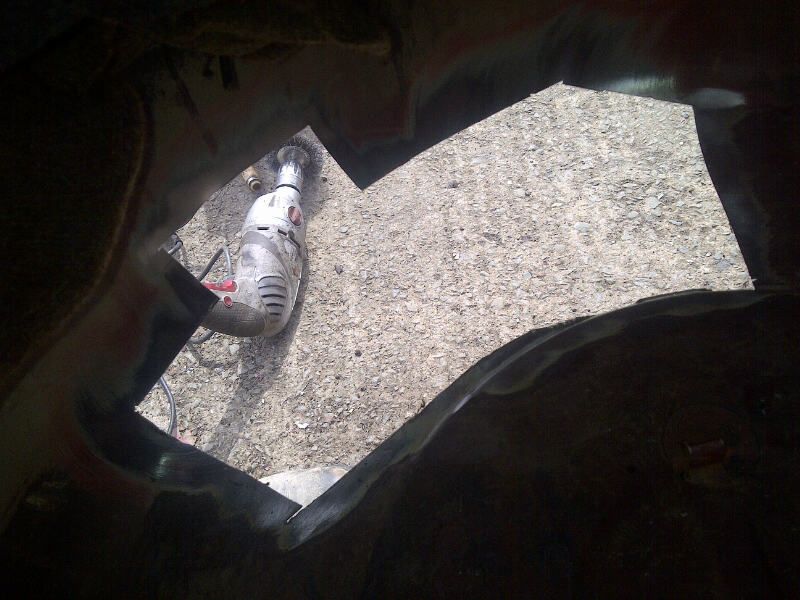
Used spot weld cutter to remove all the spot welds.

Cut the well out with angle grinder with cutting blade and then chiseled the remains away

Image
Image

Then used the wheel well to make up a template for the panel Im going to weld in using the holes left over from removal for pug welds.

But unfortunately the sheet metal I get is not quite wide enough to do it in one go so Il have the weld a bit more on.

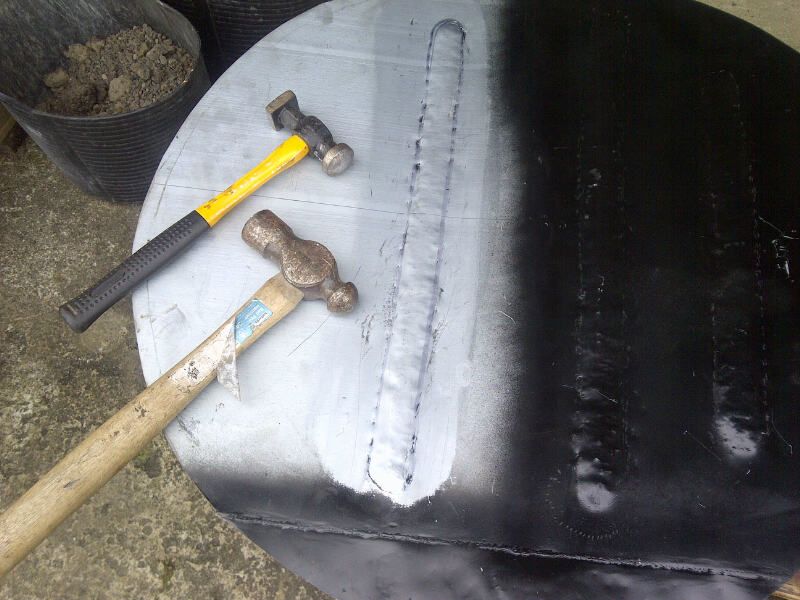
I started to knock in some strengthing strips, firs ttime doing this, going to flatten them a little and shape a bit nicer, but will defo do the job.

Image
Image

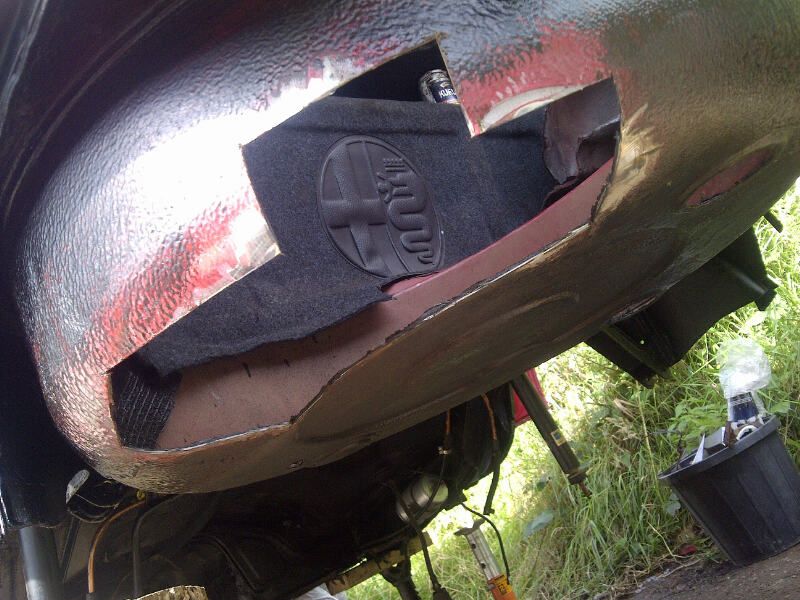
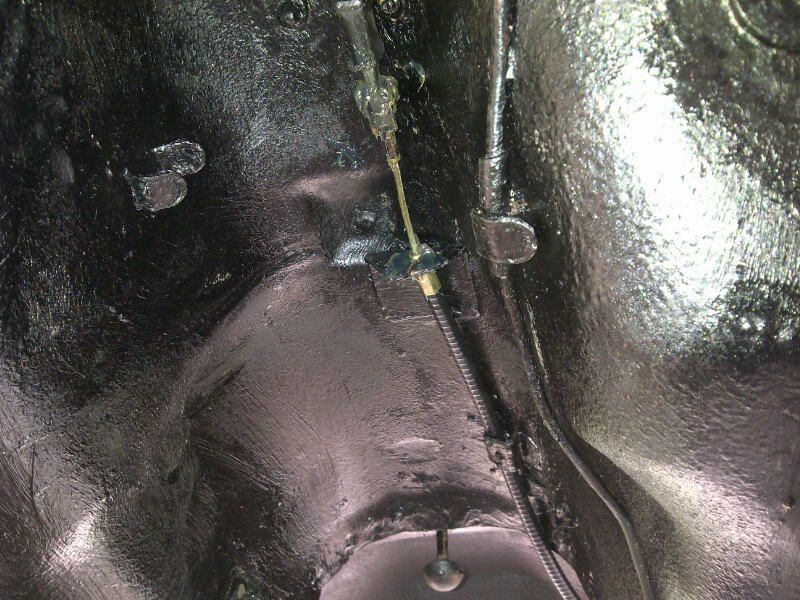
Oh found more bodge, boot seal area, full of filler over rot!

Image

Found a bit of BMX piping ( I had cut some up to make a go kart for my daughter) that has the same profile as the swage and mounted on a piece of box steel to make a former to try an improve them.

Image
Image
Image
Image
Image

Swapped over form the big hammer to my proper metal working hammer which instantly gave a smoother finish, and then dressed it over my former with a flat head. Looking better.

Image

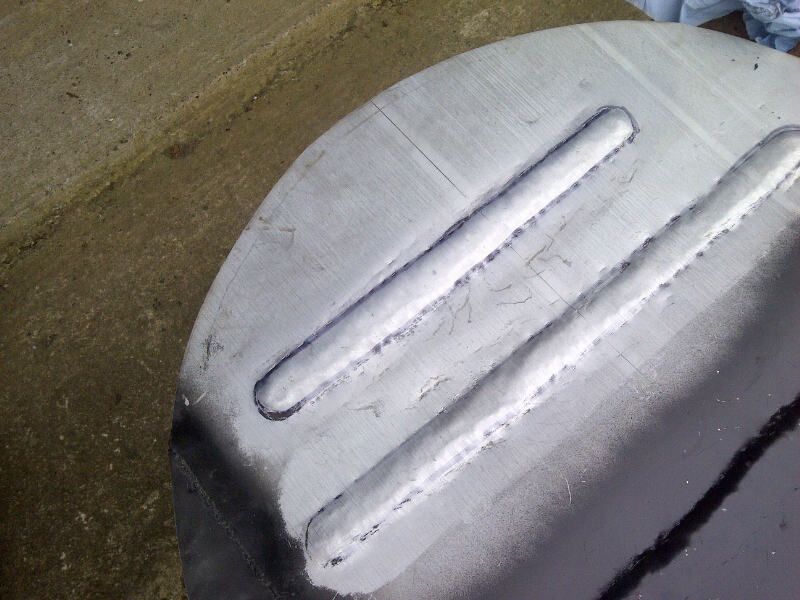
Last attempt was the best and using a blunt chisel to go round the edge gave a better shape

Image

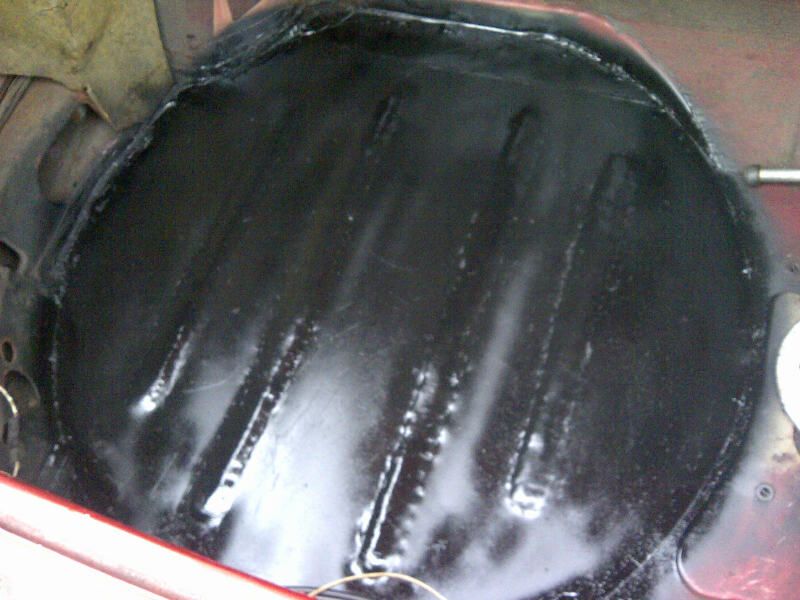
All welded in from underneath.

Image
Image

In reality its all going to get covered in heavy stone chip so the ripples would never have been seen but I just wanted to know it was the best to my ability.

By no means perfect and being as I was trying to match the alfa swages which made it hard I feel.

All seam sealed in now ready for the paint etc.

One more thing ticked off! And hopefully easier brake pad changes in future!

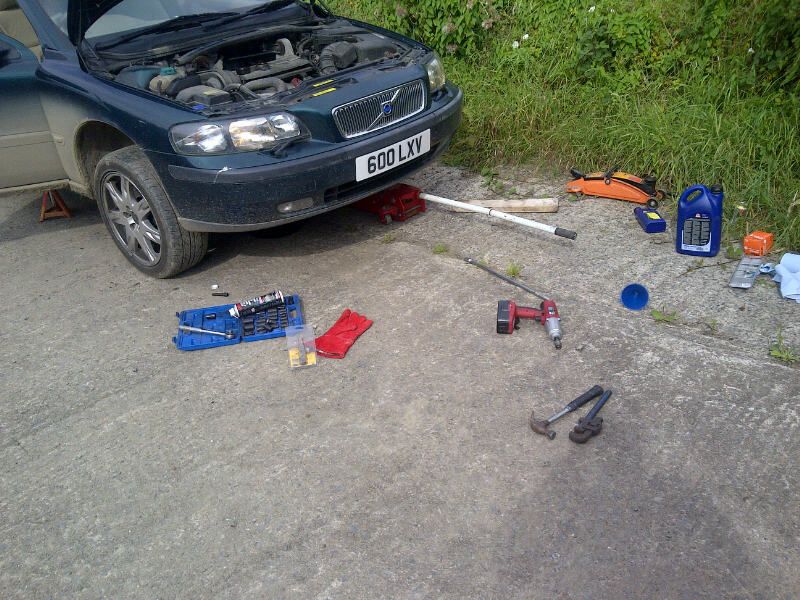
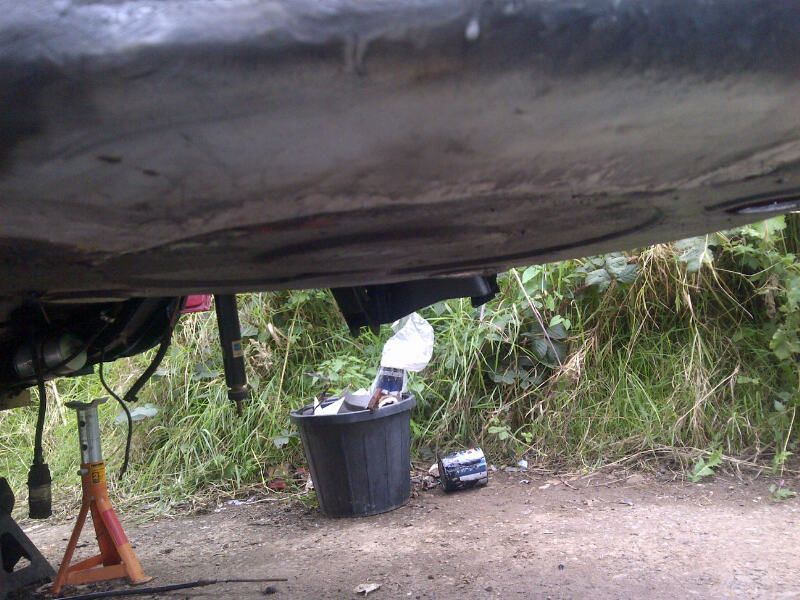
Then not got alot done as been sorting my daily, 92 Saab 900 Convertible for MOT.

But yesterday I got a few odds and sods done.

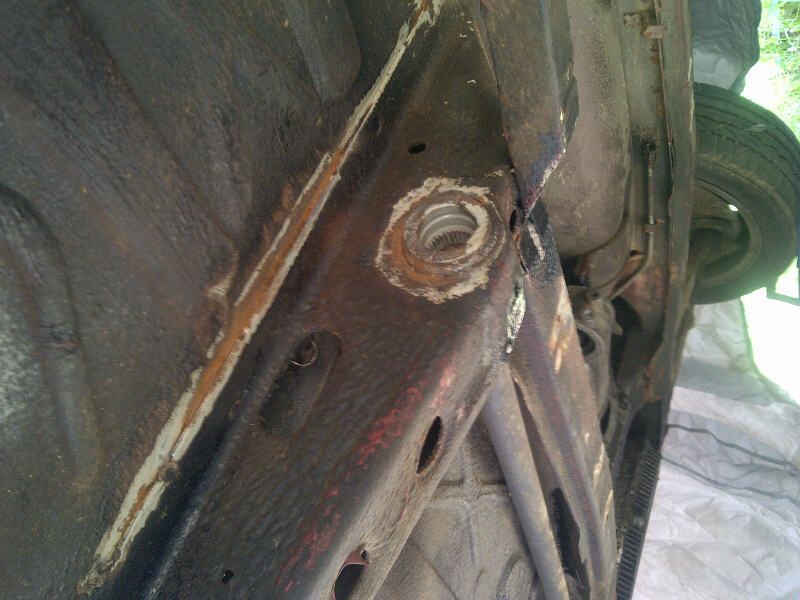
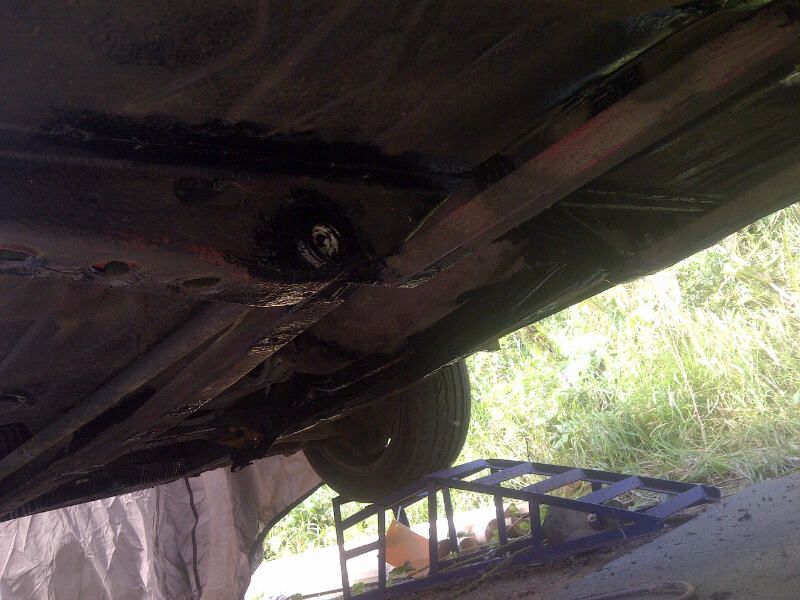
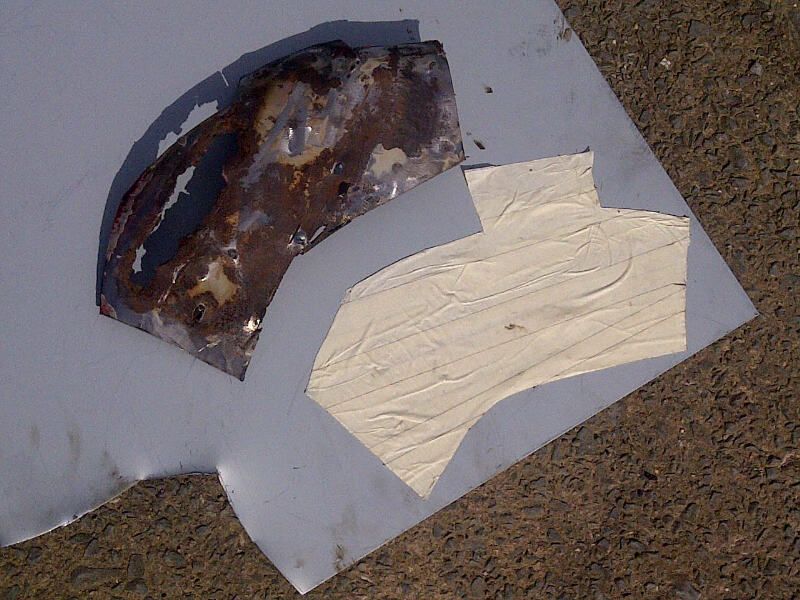
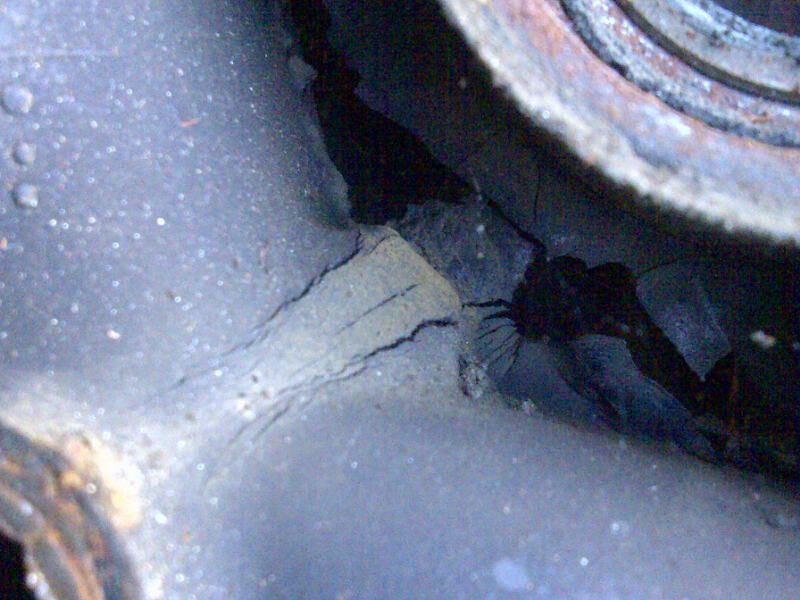
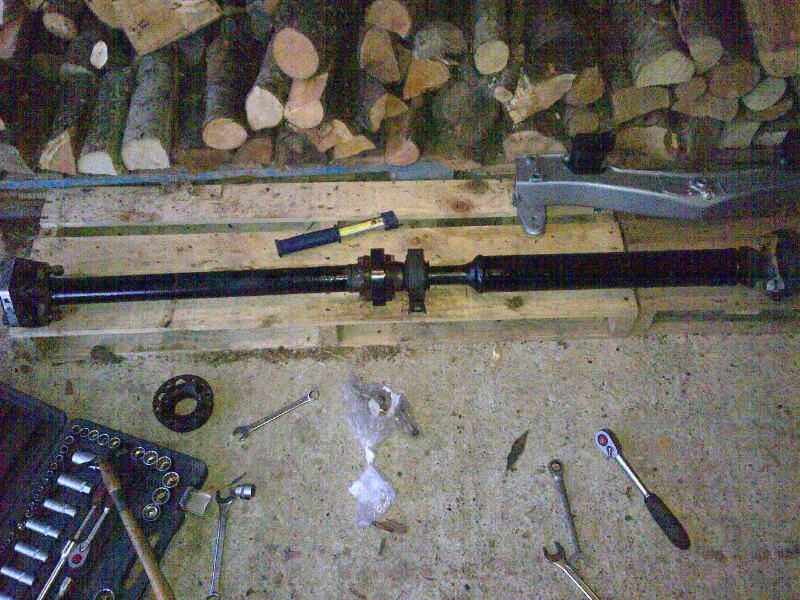
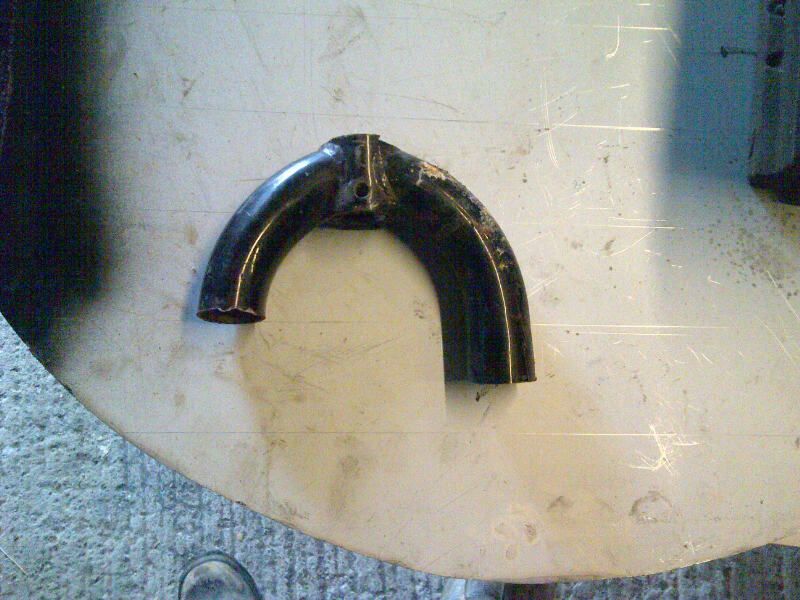
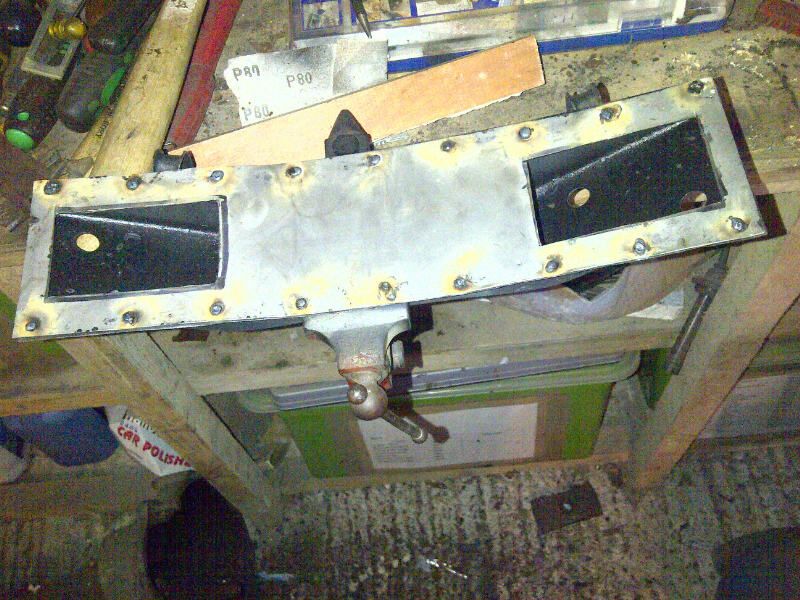
First to sort was the rotten centre prop support jobbie (there to catch it I guess if it drops). The top was completely rotten.

Image

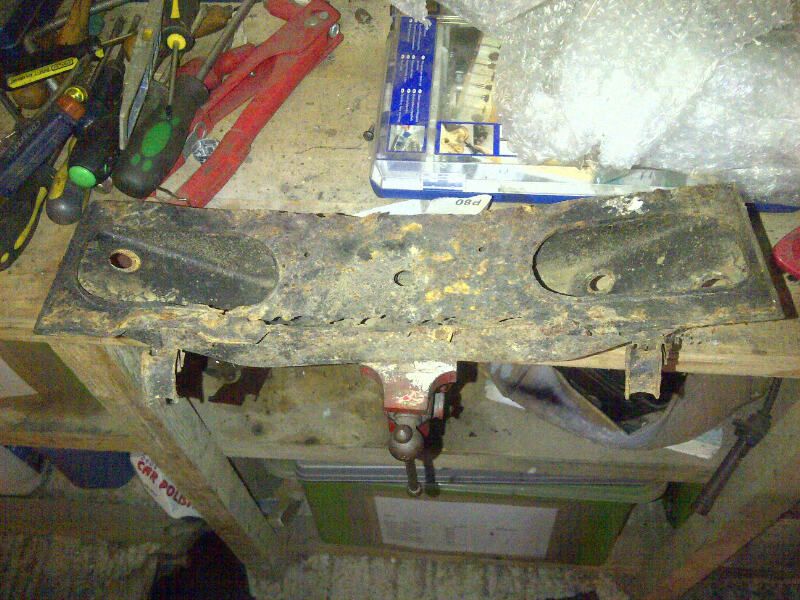
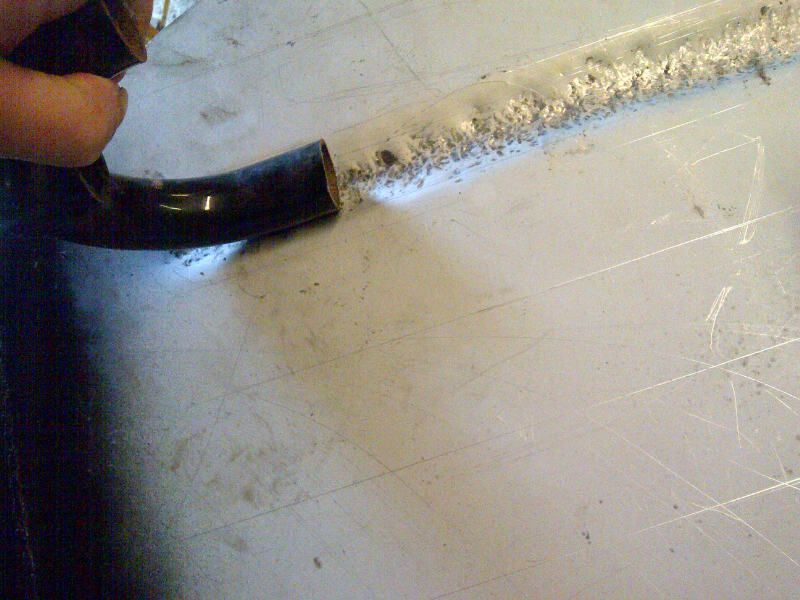
Bottom ok after a wire brush

Image

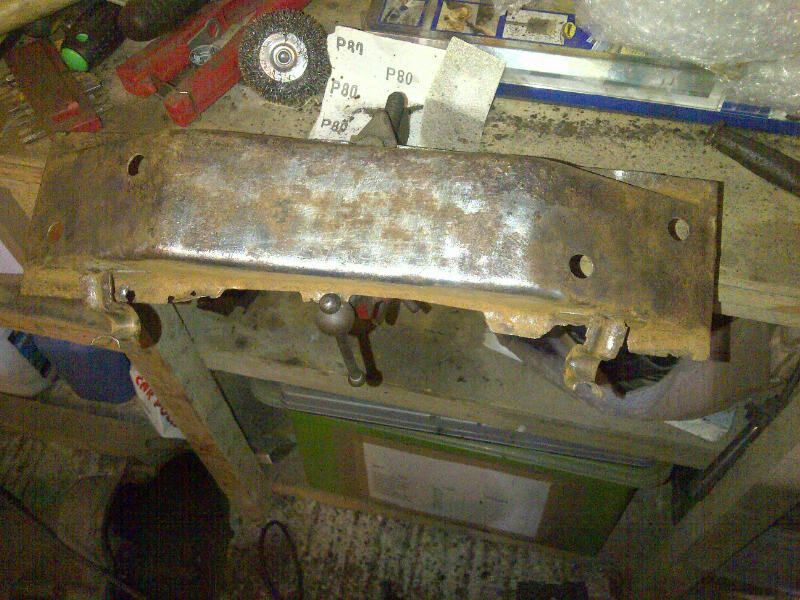
Took out spot welds and chiselled the top off

Image

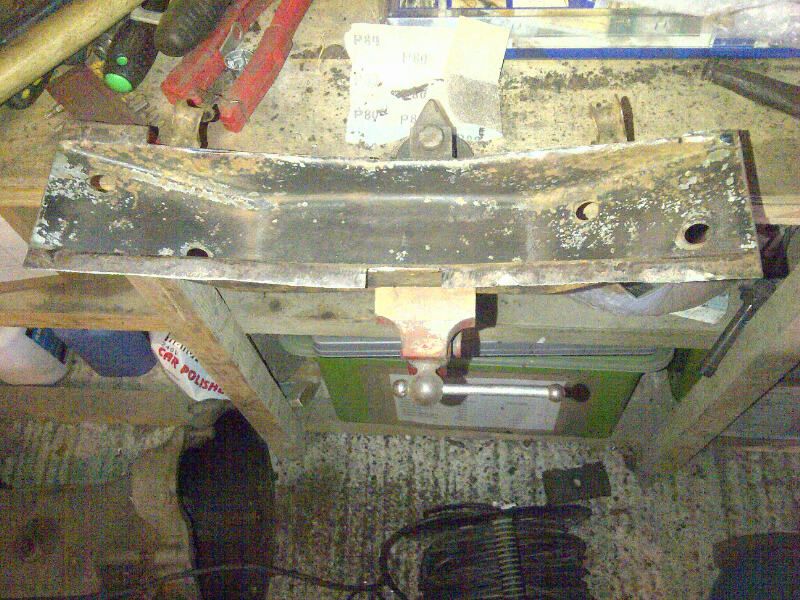
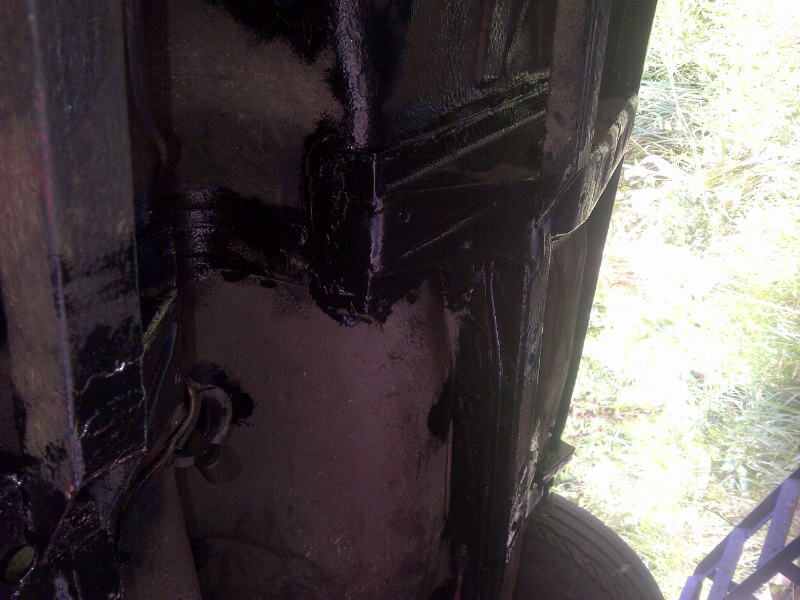
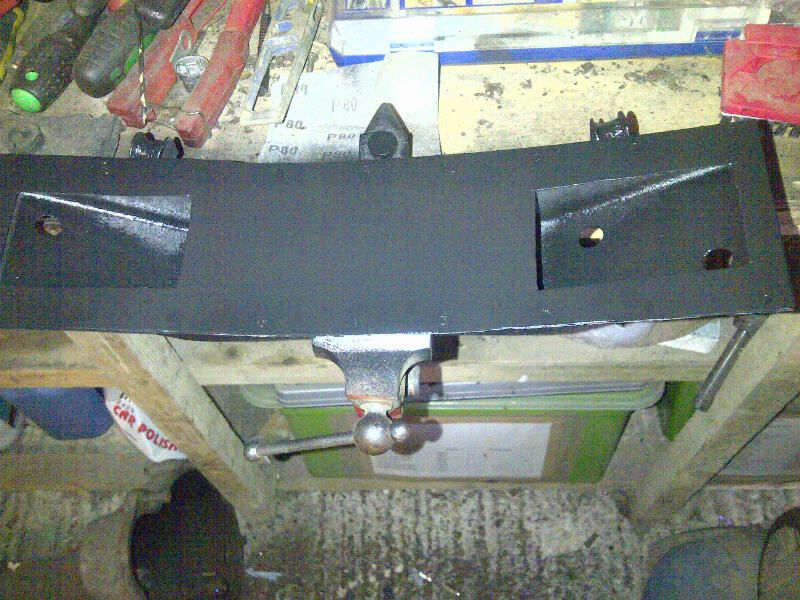
Cut out rot and welded in new edge

Image

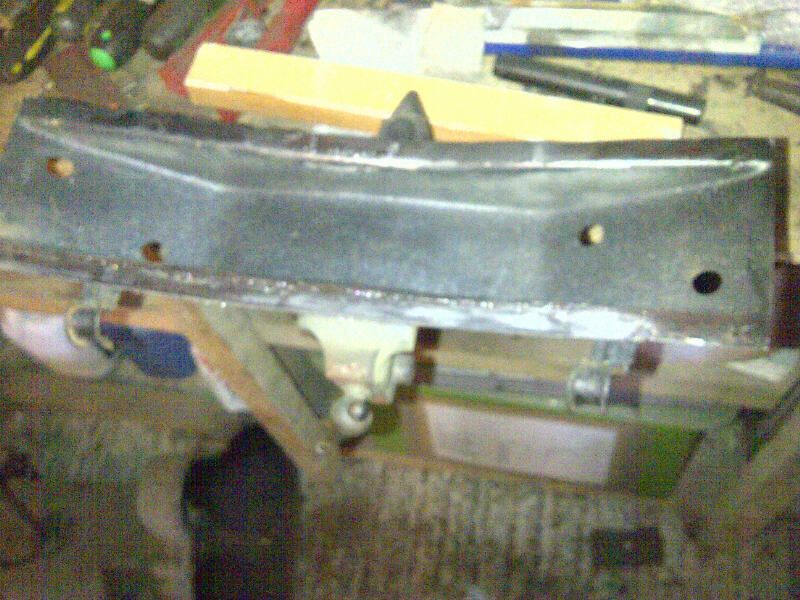
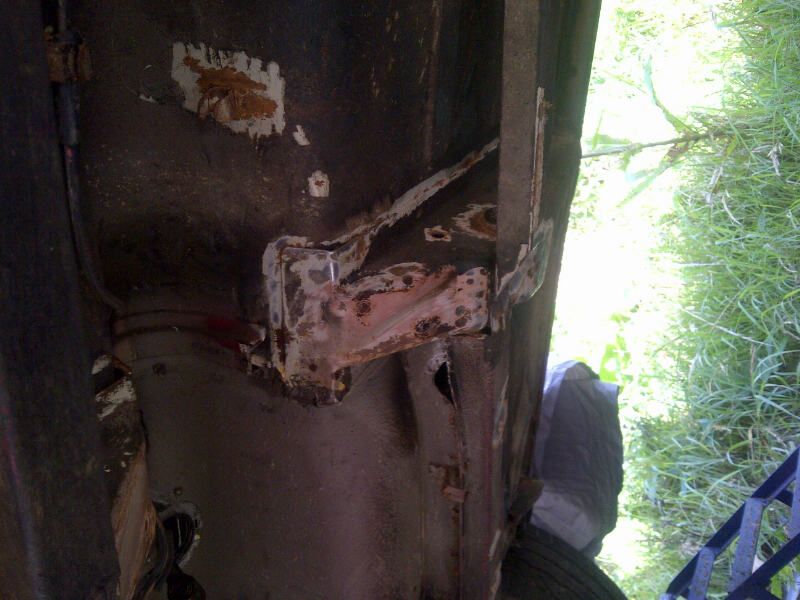
The wire brushed, zinc primed and stonechipped, covering the area I would be spot welding to

Image
Image

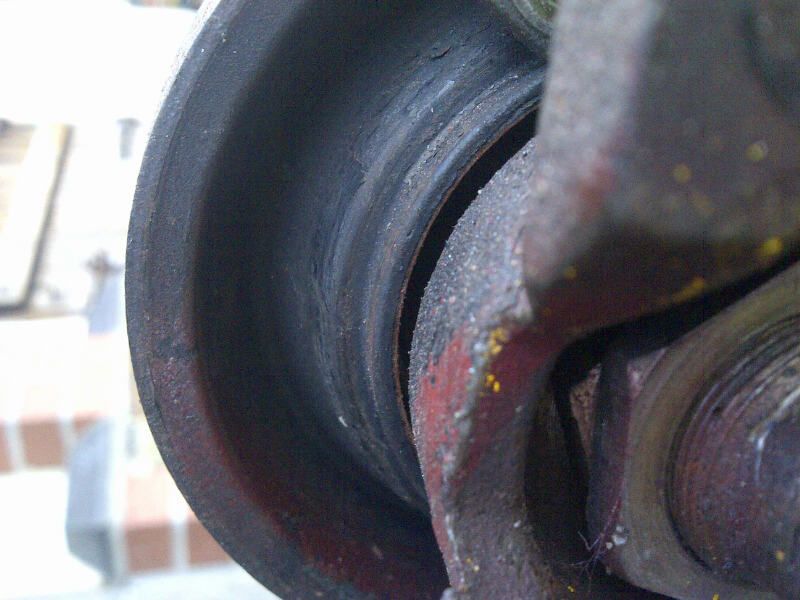
Plug welded new panel over top, did not see the need to replicate the oval shape, its just allows access to the bolts.

Image

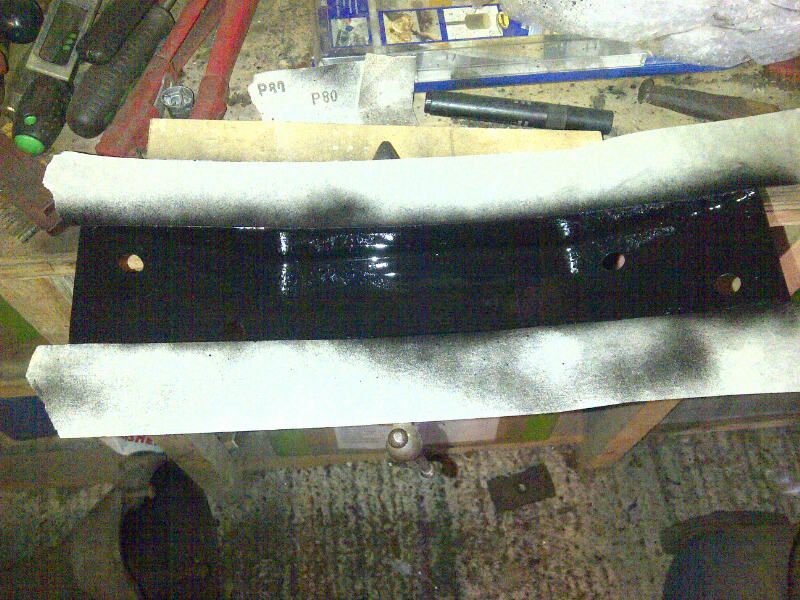
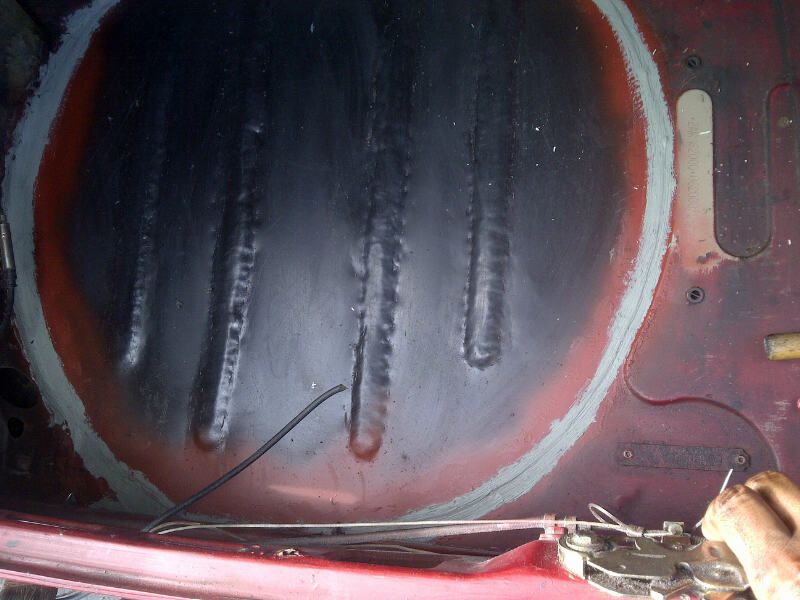
Then zinc primed and stone chipped whol thing after grinding off the plug welds

Image

Went back ,wire brushed off the seam sealer that had reacted to the spare wheel panel I had put in and re applied, it seemed not to like zic primer but ok with red oxide. Left to dry as it will then get hammerited,sptone chipped and waxoyled.

Image

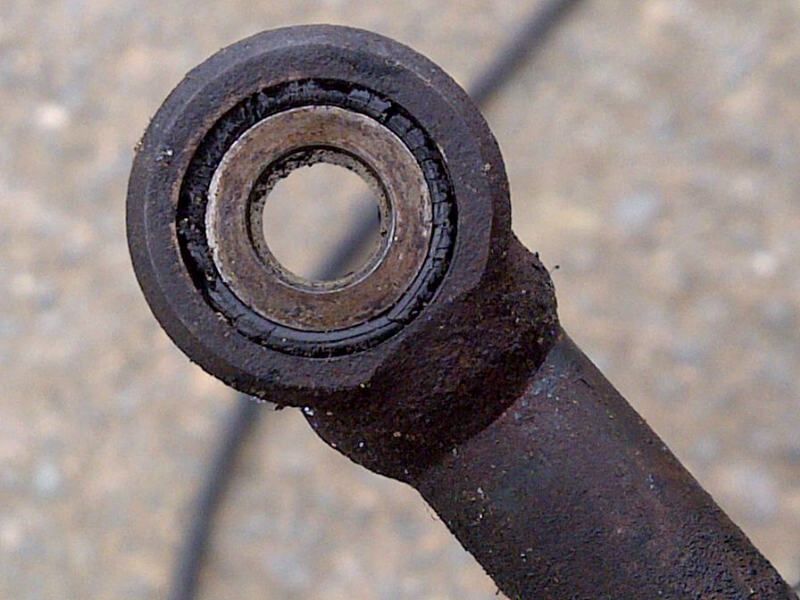
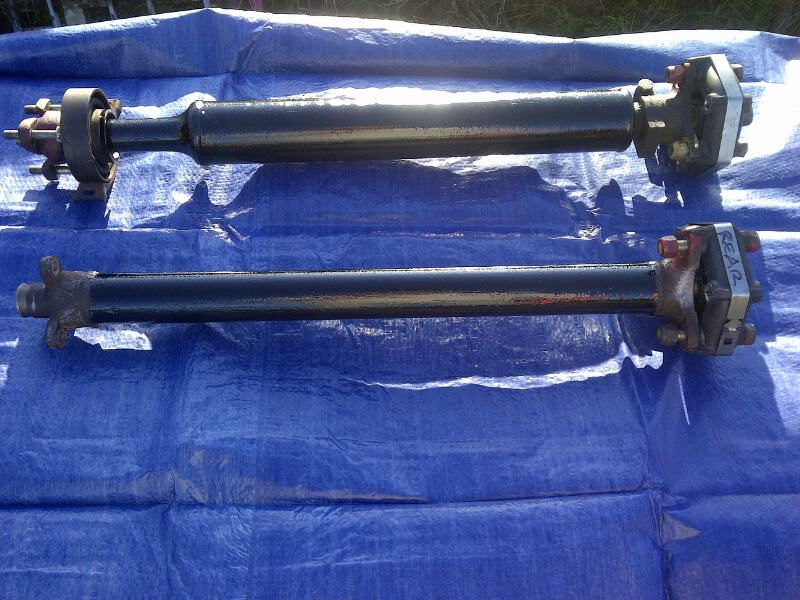
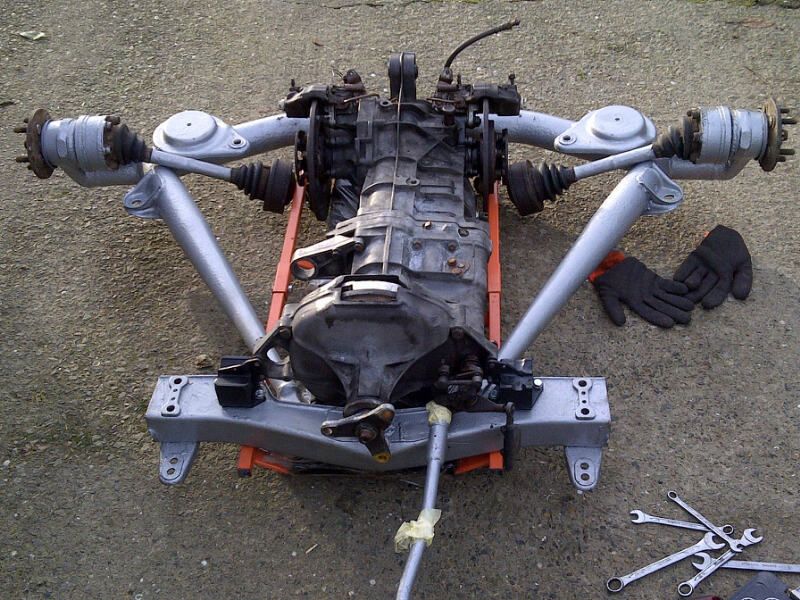
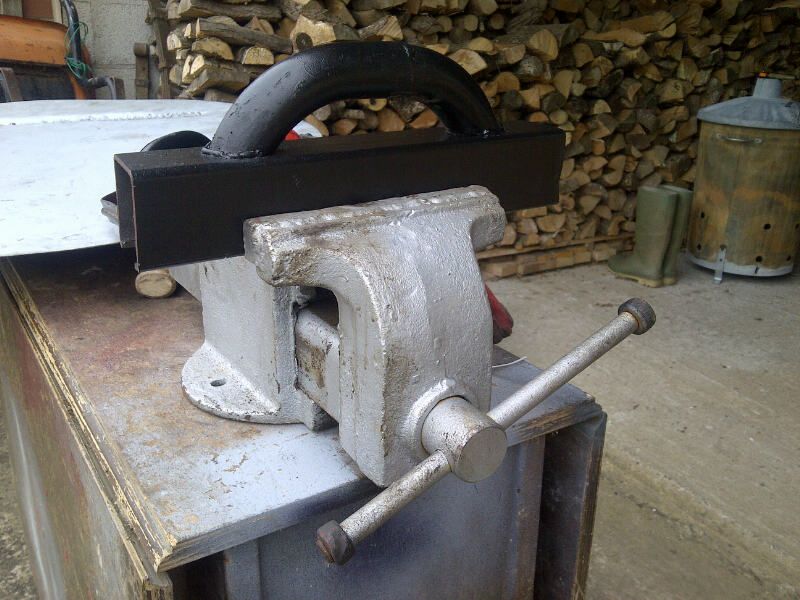
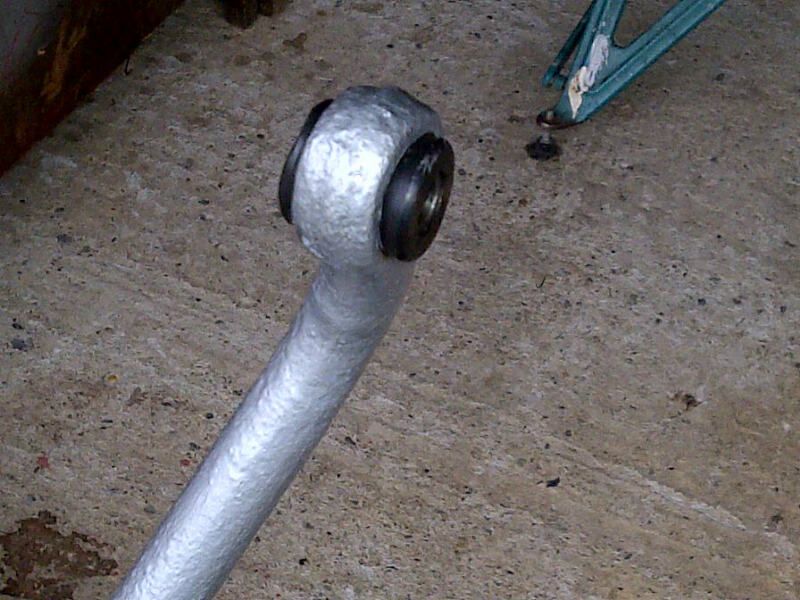
A delivery of bits had arrived, bushes, anti roll bar and a frame, figure mas a well do all while its all out.

Image

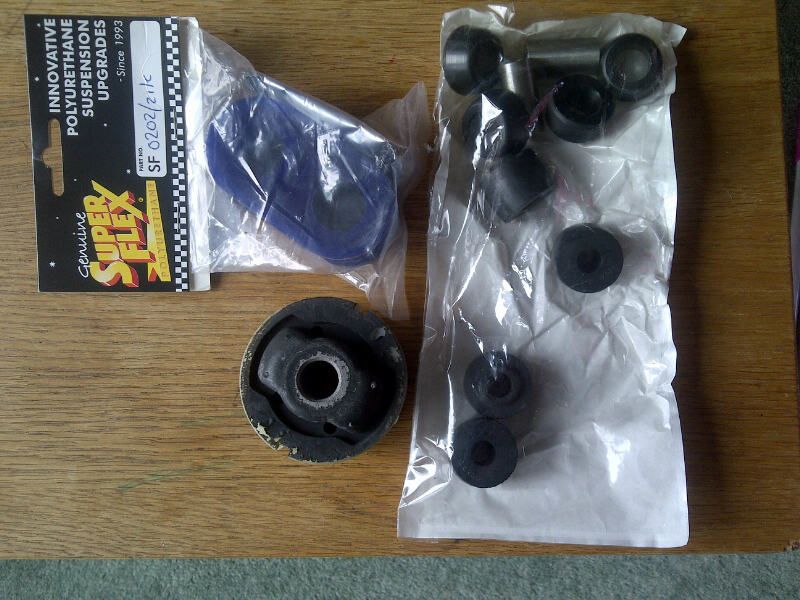
A frame bush got burnt out, anti roll bar I pushed out.

Image

Id had painted it before as the bush had been ok, but now want everything as new its not good enough.

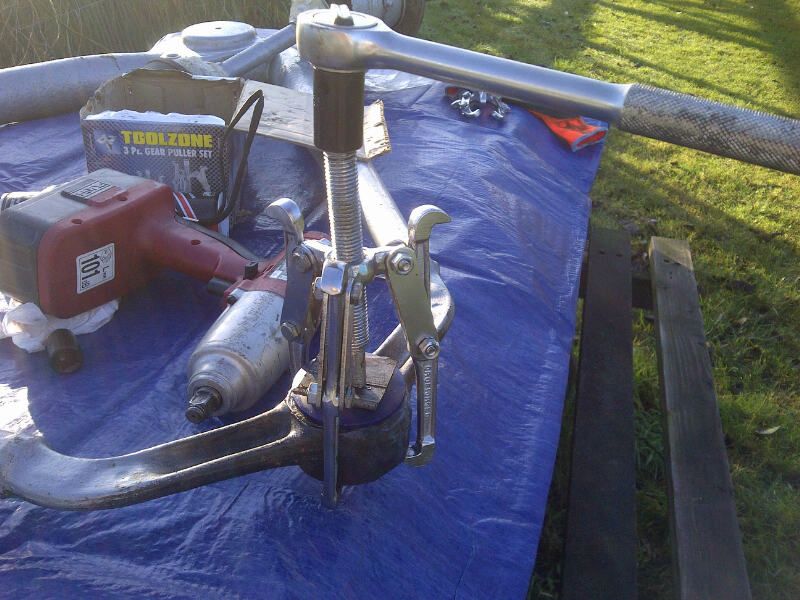
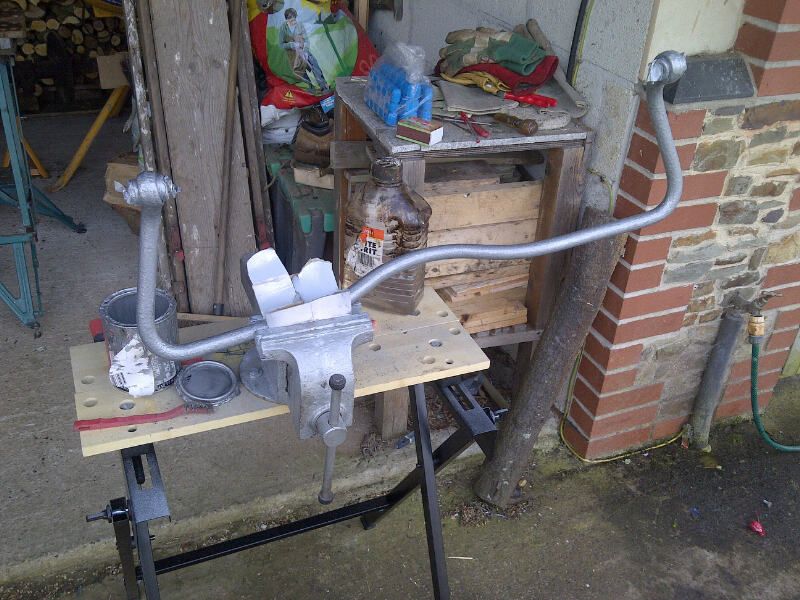
Pressed the anti roll bar bushes with sockets and vice after they had spend a few hours in the freezer and I had heated the hole.

Image
Image

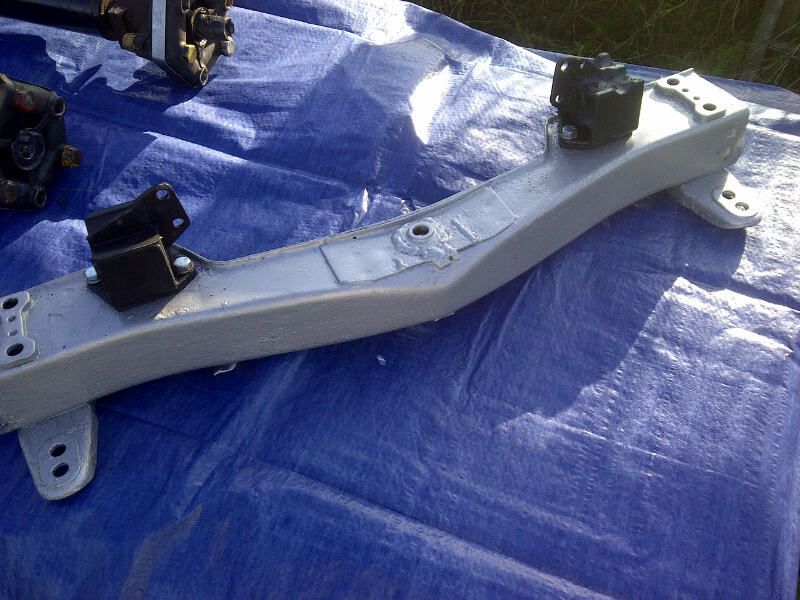
It got a paint after

Image

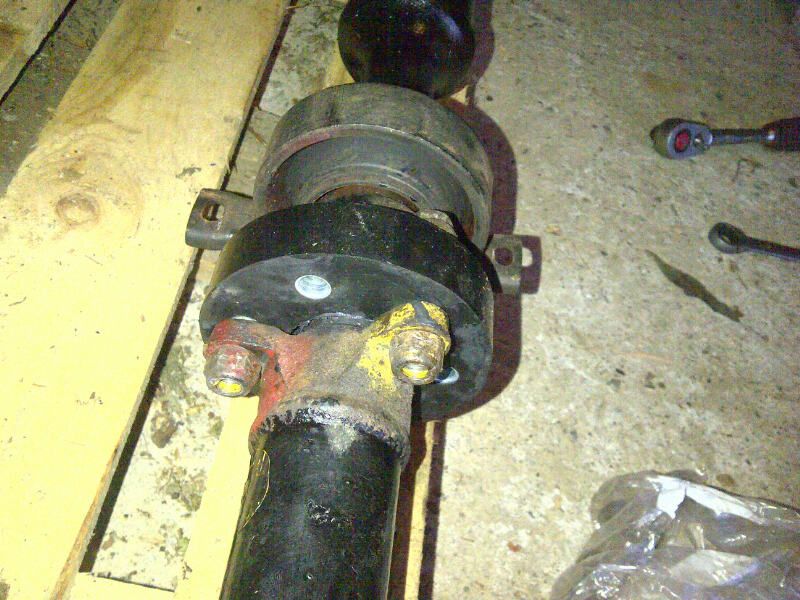
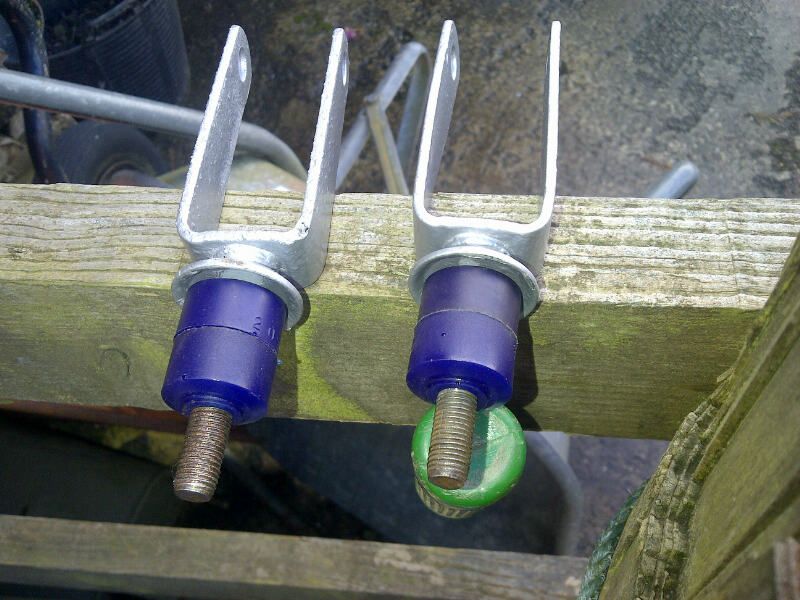
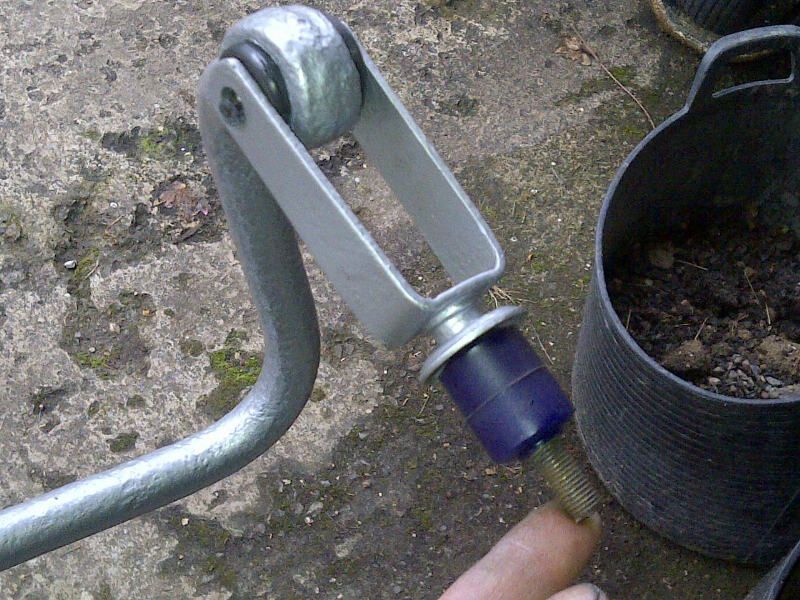
Painted yoke and add he new poly bushes, all ready for new bolts, which currently I don't have lol!

Image
Image

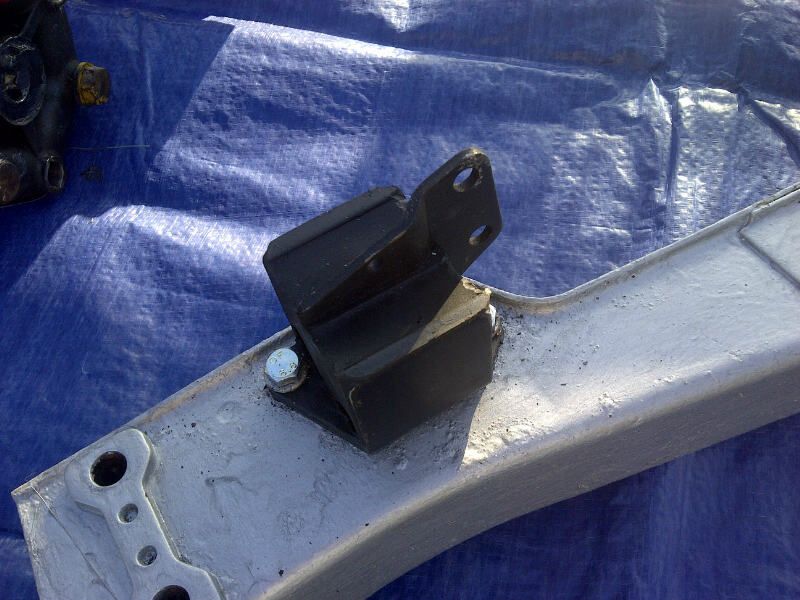
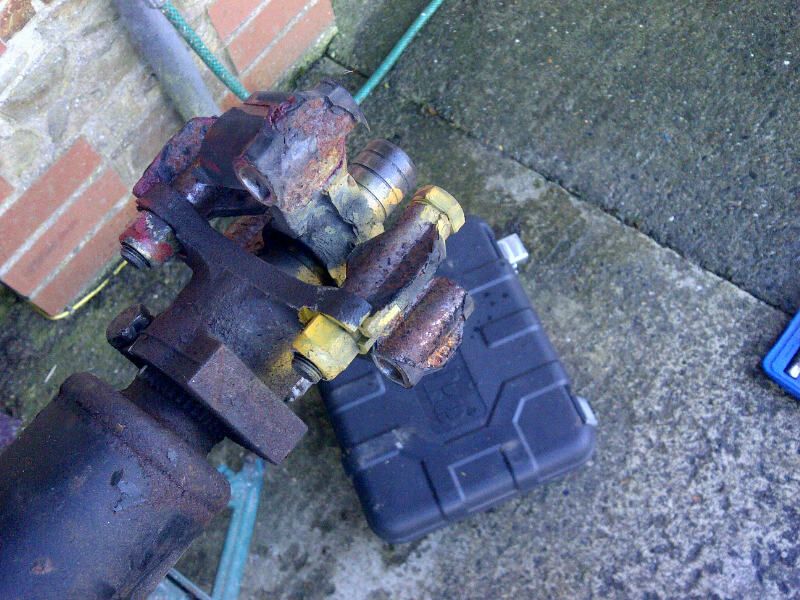
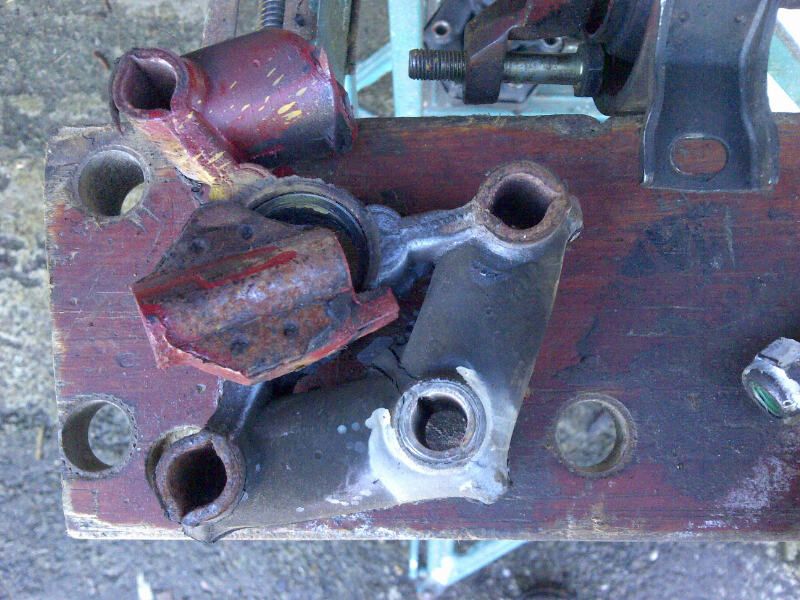
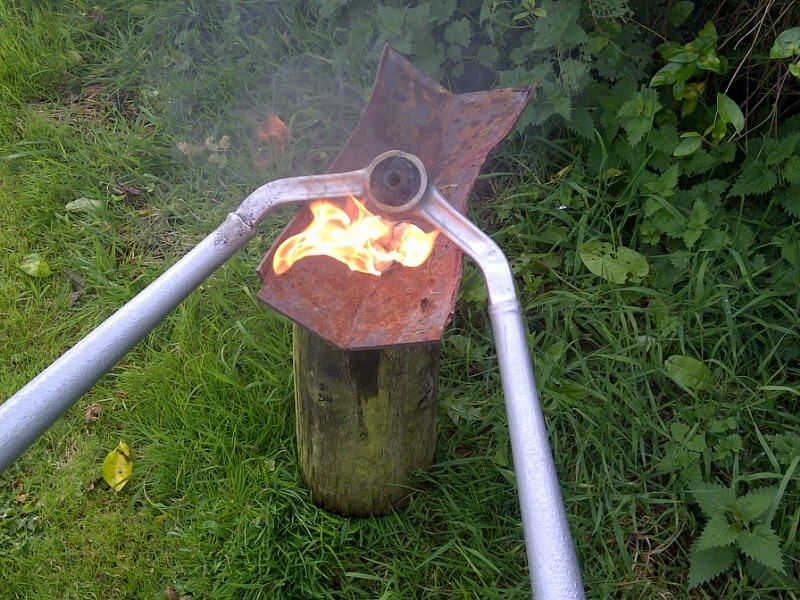
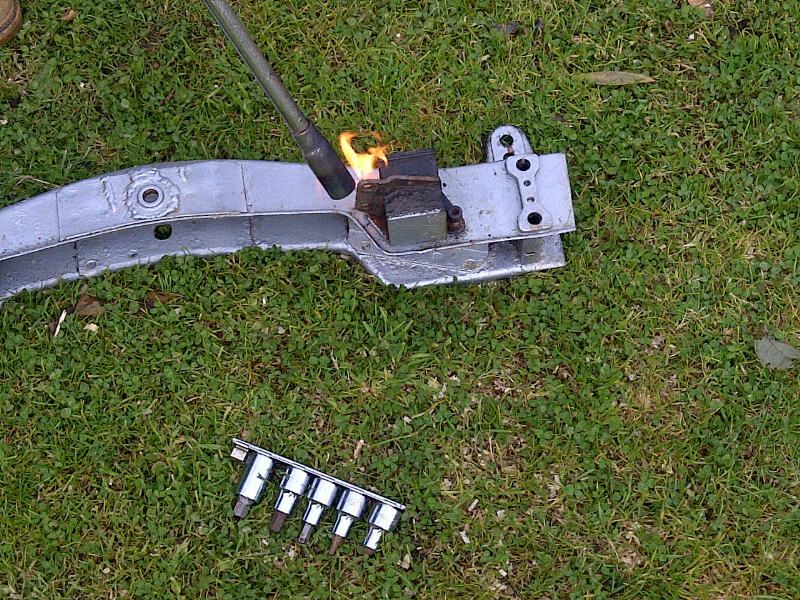
The gearbox mounting bushes are also to be replaced with brand new (she should be tight as a drum after all this!) , but the bolts where solid ,so the propane weed burner came out to remove those pesky hex bolts! Worked treat

Image
Image

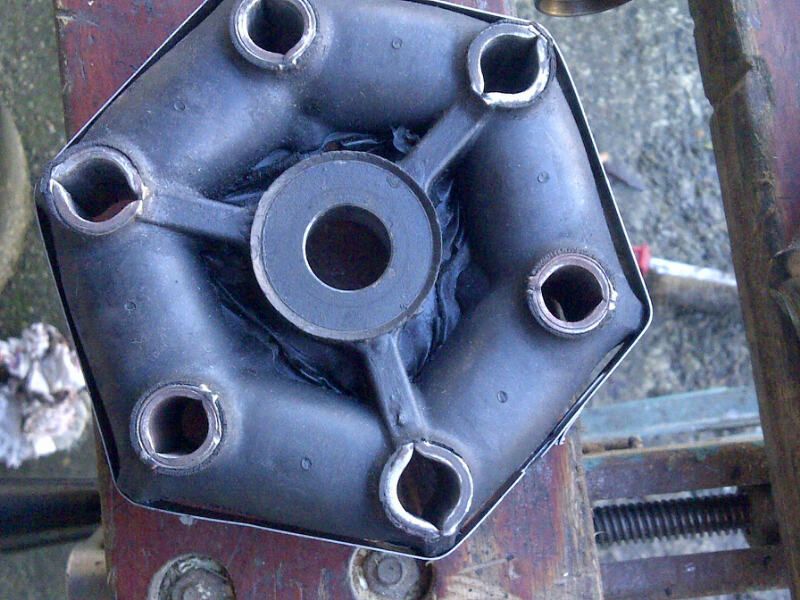
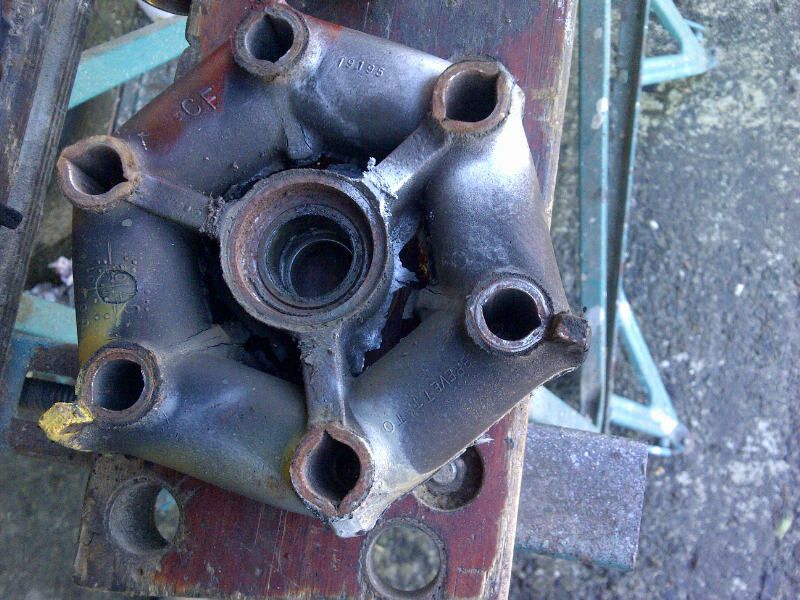
Will also get a coat of paint ready for the new bushes.

The A frame bush is in freeze awaiting installation.

Thats all , cheers

75nut
Posts: 151
Joined: Wed Jun 22, 2011 7:31 pm

Re: Alfa Romeo 75 3.0 V6 1991 Ongoing Project

#58 Post by 75nut » Wed Jan 16, 2013 9:47 pm

Weather was good so ditched the office and cracked on!

First up pressed the the new poly bush in the A Frame after freezing it and using a puller

Image

The fitted the new gearbox mounts

Image
Image

Set about the prop

When your front donut looks like this is time to do something lol!!

Image
Image

New one ready to go on , and yes im leaving the metals bands on untill its all fitted on car!

Image

Also got a rear one , this is the old one, its total useable but some very small cracking present and I dont want to take it all off again anytime soon

Image
Image

Decided to leave the support as its ok with no cracking so the new one will be sent back to EBSpares or sold off cheaper on here

Image
Image

Gave the tubes a light coat of paint and lightly bolted the new donuts on

Image

Then added my new Poly centre donut , and as you can see had a brain freeze and bolted the yolks to each other not just the donut, time to dig out the extra set of bolts lol!

Image

So here is how it is, lightly bolted ready to re instal once the aframe and gearbox are back in.

Image

Intresting to notice someone already marked the nip bolt

Image


Finished building up the gearbox and AFrame.

Image

I also got the prop back in on the front mounts and the centre support ready to connect the gearbox tommorow.

No pic as my phone battery ran out and by then the sun was going down and it was bloody freezing!! I'd been working all day in 4 layers lol!

User avatar
JPB
Posts: 10319
Joined: Fri Jan 07, 2011 3:24 pm

Re: Alfa Romeo 75 3.0 V6 1991 Ongoing Project

#59 Post by JPB » Thu Jan 17, 2013 8:14 am

Good progress here, just one constructive point if it's OK;
did not see the need to replicate the oval shape, its just allows access to the bolts.
It does, but even if they're not the original shape, the slots shouldn't have corners. They're that shape for stiffness and will crack and run from the corners in time. I'd not pull the whole thing apart though, just lose any corners and make sure the ends are round, that should do it. While you're in about at that, it's a good idea to make the nuts captive for ease of assembly. I had two consecutive 75s back in the late '90s, by which I mean that the cars actually were consecutively numbered and had been supplied the same day and time to the NEEB fleet. I rebuilt the better of the two and ended up swapping both for a (Volvo) 164 accidentally. The patter only said "164" so you'll guess what I was expecting to find. :oops: :lol:
I'd had 140s for years so the prospect of the longer IL6 version of the same wasn't altogether unwelcome and that big 6 with its fuel injection used no more fuel than the twin spark on Dellortos. :?

:)
J
"Home is where you park it", so the saying goes. That may yet come true.. :oops:

75nut
Posts: 151
Joined: Wed Jun 22, 2011 7:31 pm

Re: Alfa Romeo 75 3.0 V6 1991 Ongoing Project

#60 Post by 75nut » Thu Jan 17, 2013 9:51 am

I see your valid point concenring stifness, put isnt the part there simply to catch the prop if it drops, it doesn't perfrom any other function does it?

Post Reply

Who is online

Users browsing this forum: No registered users and 8 guests